Okta SAML integration guide (Generic)
This integration guide shows how to set up Okta as a SAML single sign-on provider for your Redis Cloud account.
| Redis Cloud |
|---|
This guide shows how to configure Okta as a SAML single sign-on identity provider (IdP) for your Redis Cloud account.
Learn how to use the generic application template. You can also refer to the Org2Org application template.
To learn more about Redis Cloud support for SAML, see SAML single sign-on.
Before completing this guide, you must verify ownership of any domains you want to associate with your SAML setup. To do this, you must add a DNS TXT record provided by Redis Cloud to each domain; SAML SSO can't be enabled until the domain is verified.
Step 1: Set up your demo identity provider (IdP)
To create the Okta SAML integration application:
-
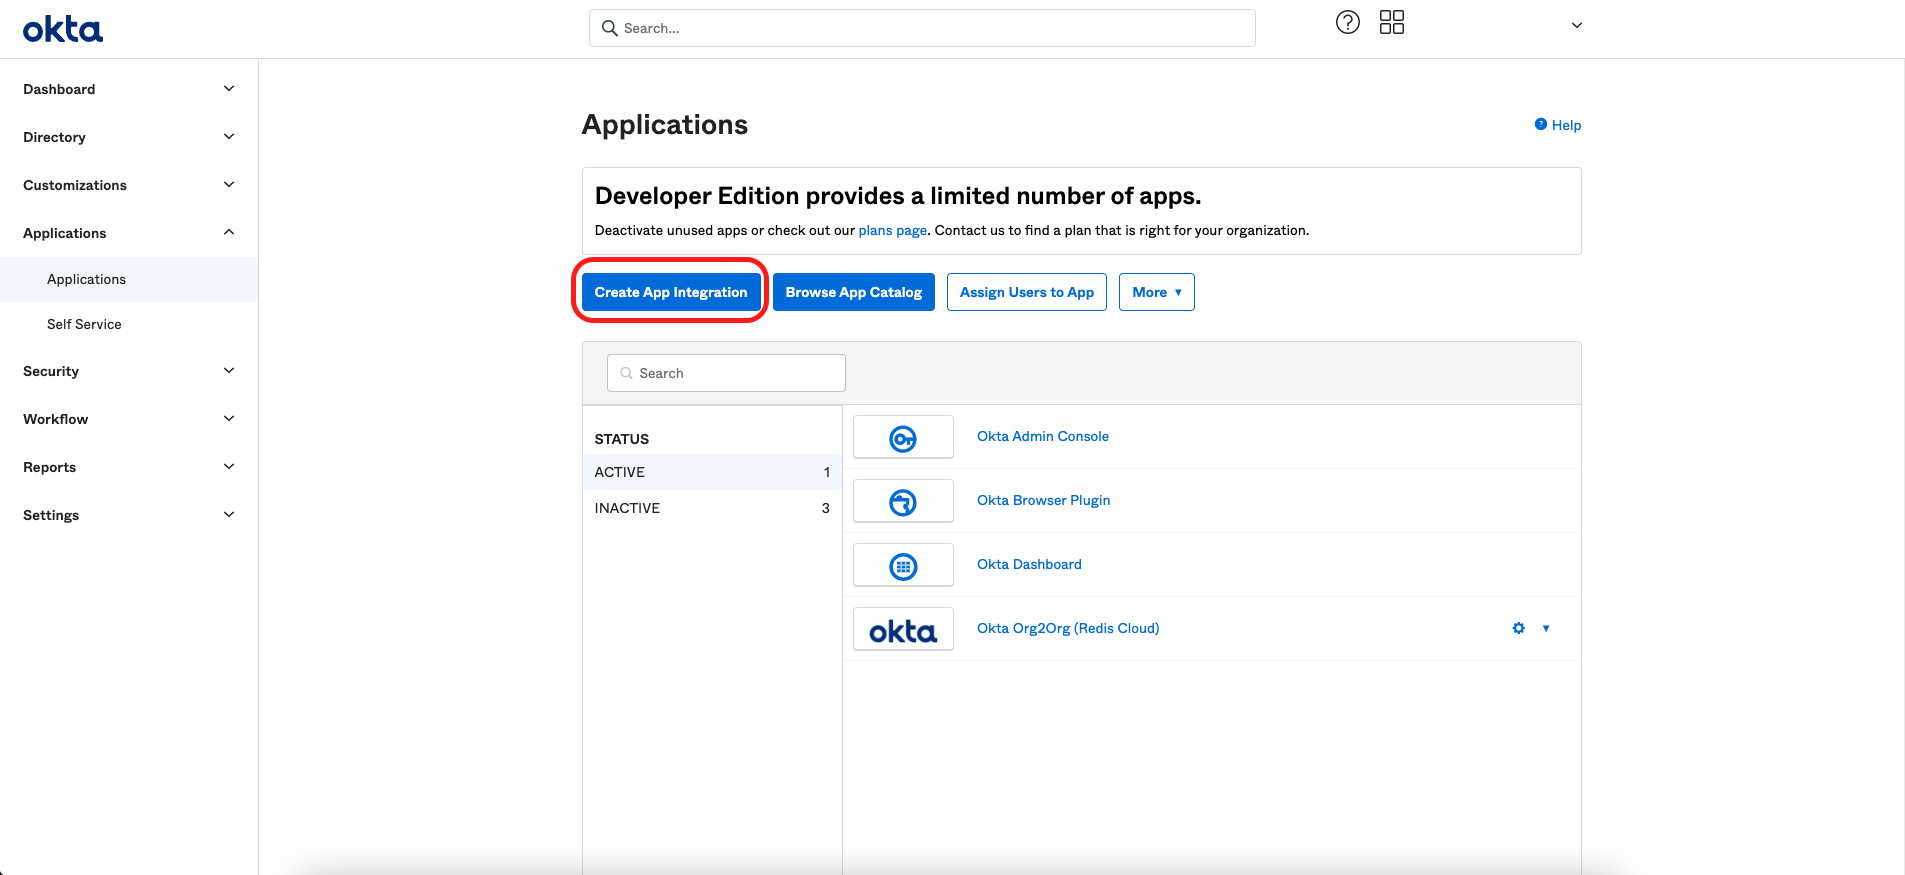
Log in to the Okta admin console. Select Applications > Create App Integration.
-
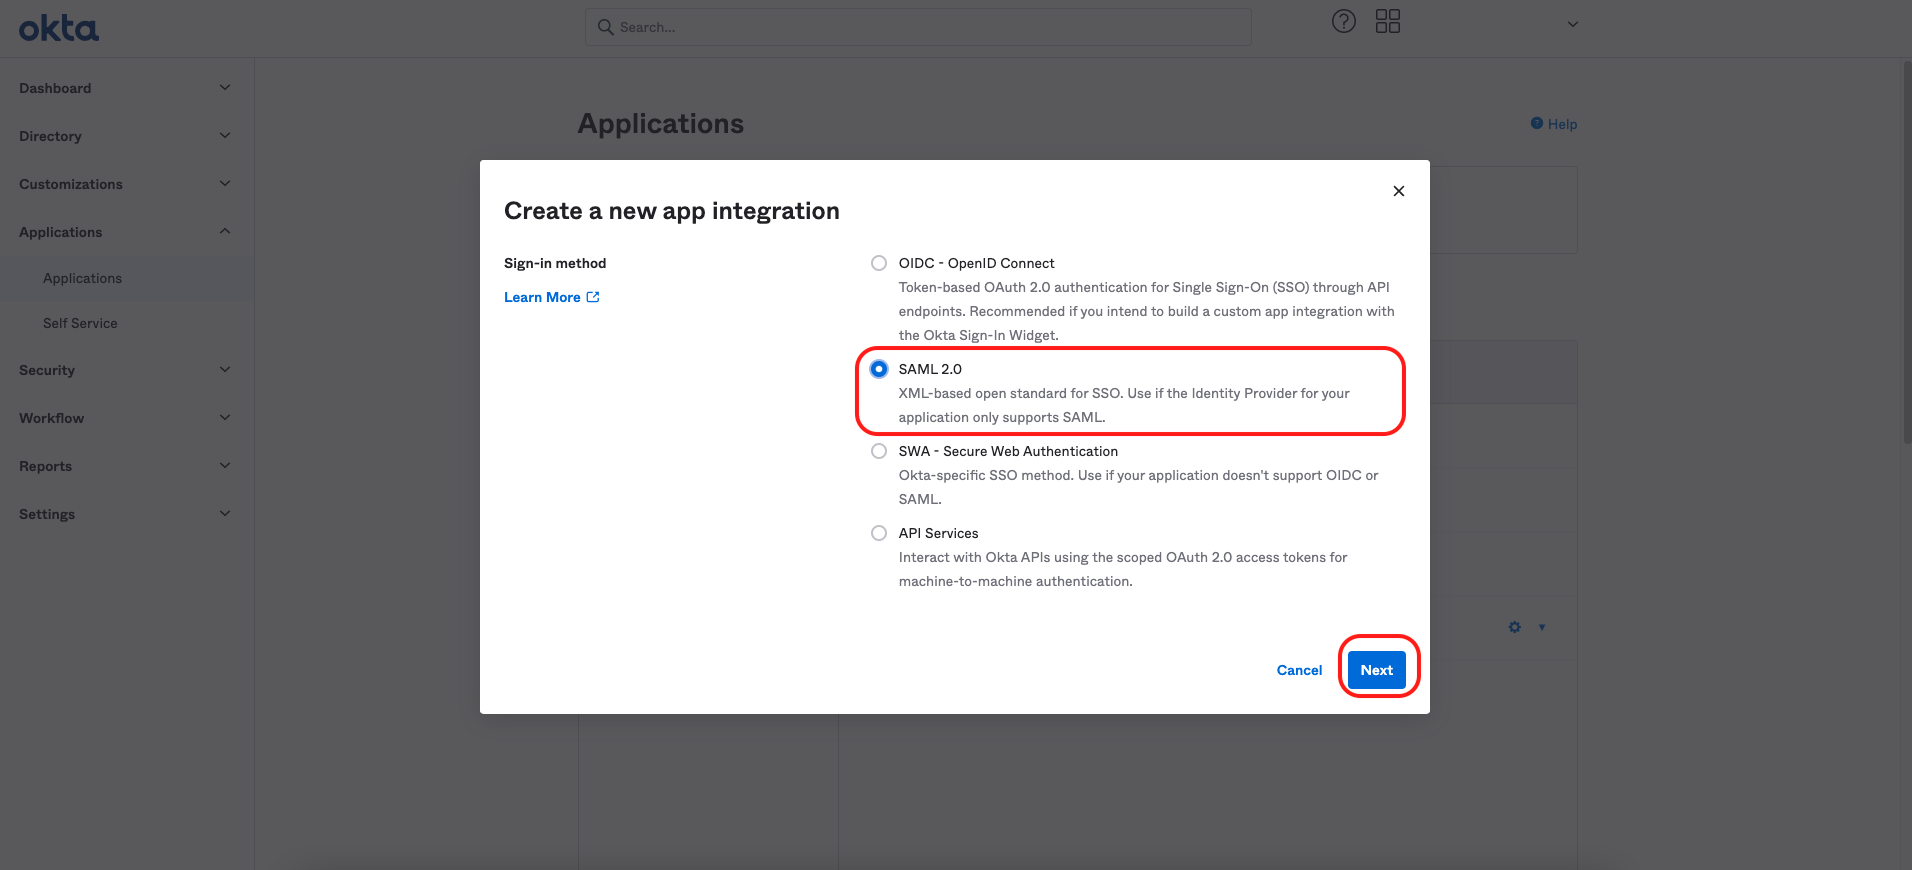
Select SAML 2.0, then select Next.
-
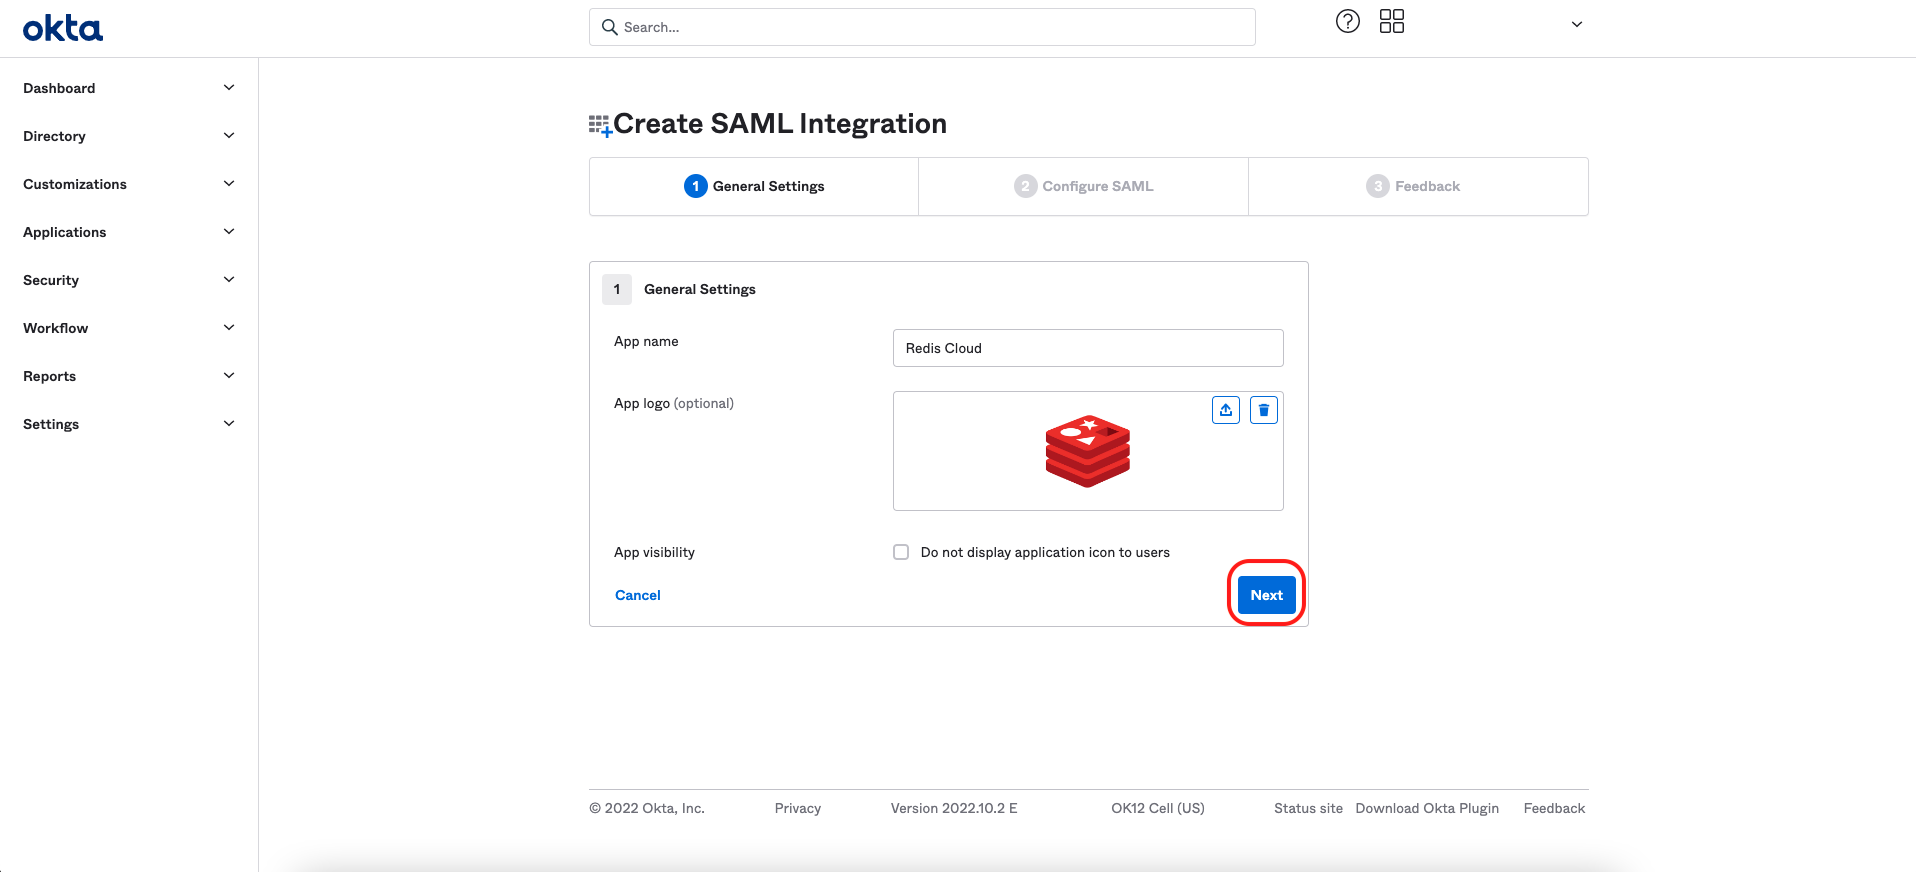
Complete these fields for the SAML application General Settings section:
-
App name: Redis Cloud
-
App logo: Upload a Redis icon.
Select Next.
-
-
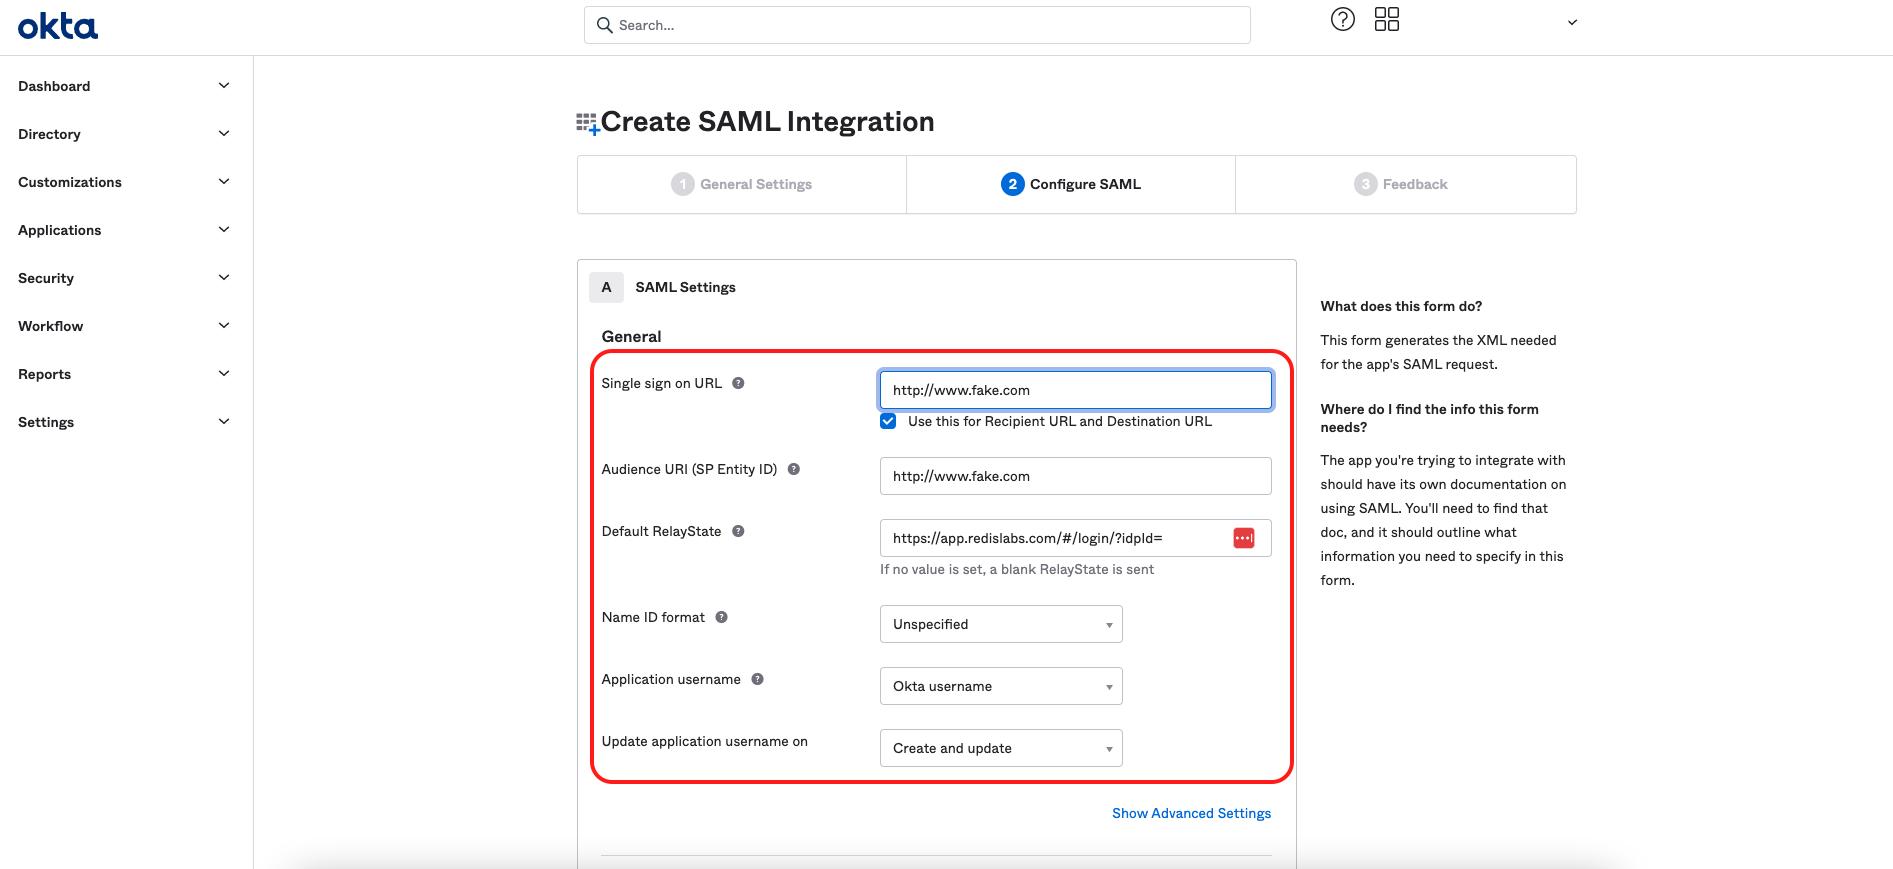
In the Configure SAML tab, enter this data in the General section:
Note:Setting up SAML SSO is a two-part handshake. You first create the Okta application with temporary mock URLs so that Redis Cloud can generate its own service provider (SP) metadata. Later, in Step 3, you return to this Okta application and replace these mock URLs with the real values from that Redis Cloud SP metadata.- Single sign-on URL:
http://www.fake.com. This is a temporary mock URL that you will modify later. - Audience URI (SP Entity ID):
http://www.fake.com. This is a temporary mock URL that you will modify later. - Default RelayState:
https://cloud.redis.io/#/login/?idpId=XXXXXX. You will need to complete this URL with theidpIdlater. Complete this field only if you need your SAML flow to be IdP initiated. - Name ID forma:
Unspecified - Application username:
Okta username - Update application username on:
Create and update
Next, add attribute statements, which are required for the configuration:
-
Attribute 1:
- Name:
redisAccountMapping - Name Format:
Basic - Value:
appuser.redisAccountMapping
- Name:
-
Attribute 2:
- Name:
FirstName - Name Format:
Basic - Value:
user.firstName
- Name:
-
Attribute 3:
- Name:
LastName - Name Format:
Basic - Value:
user.lastName
- Name:
-
Attribute 4:
- Name:
Email - Name Format:
Basic - Value:
user.login
- Name:
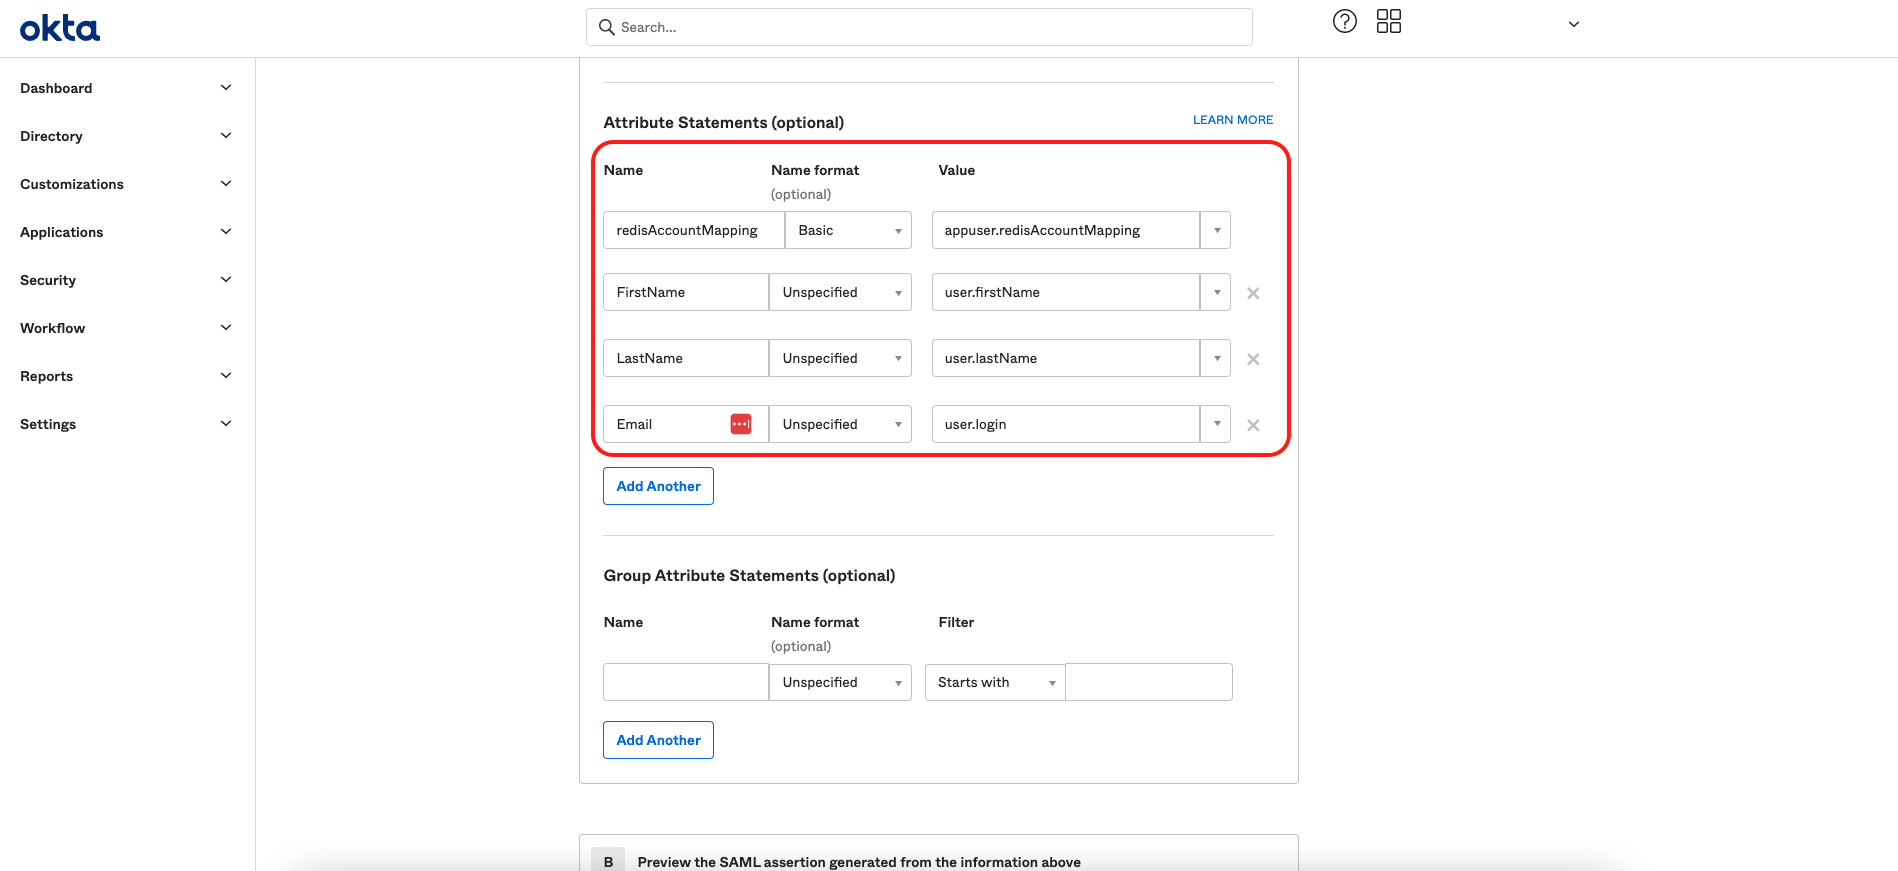 Note:The
redisAccountMappingattribute is required. If it's missing or malformed, SAML activation and subsequent SAML logins fail.Select Next.
- Single sign-on URL:
-
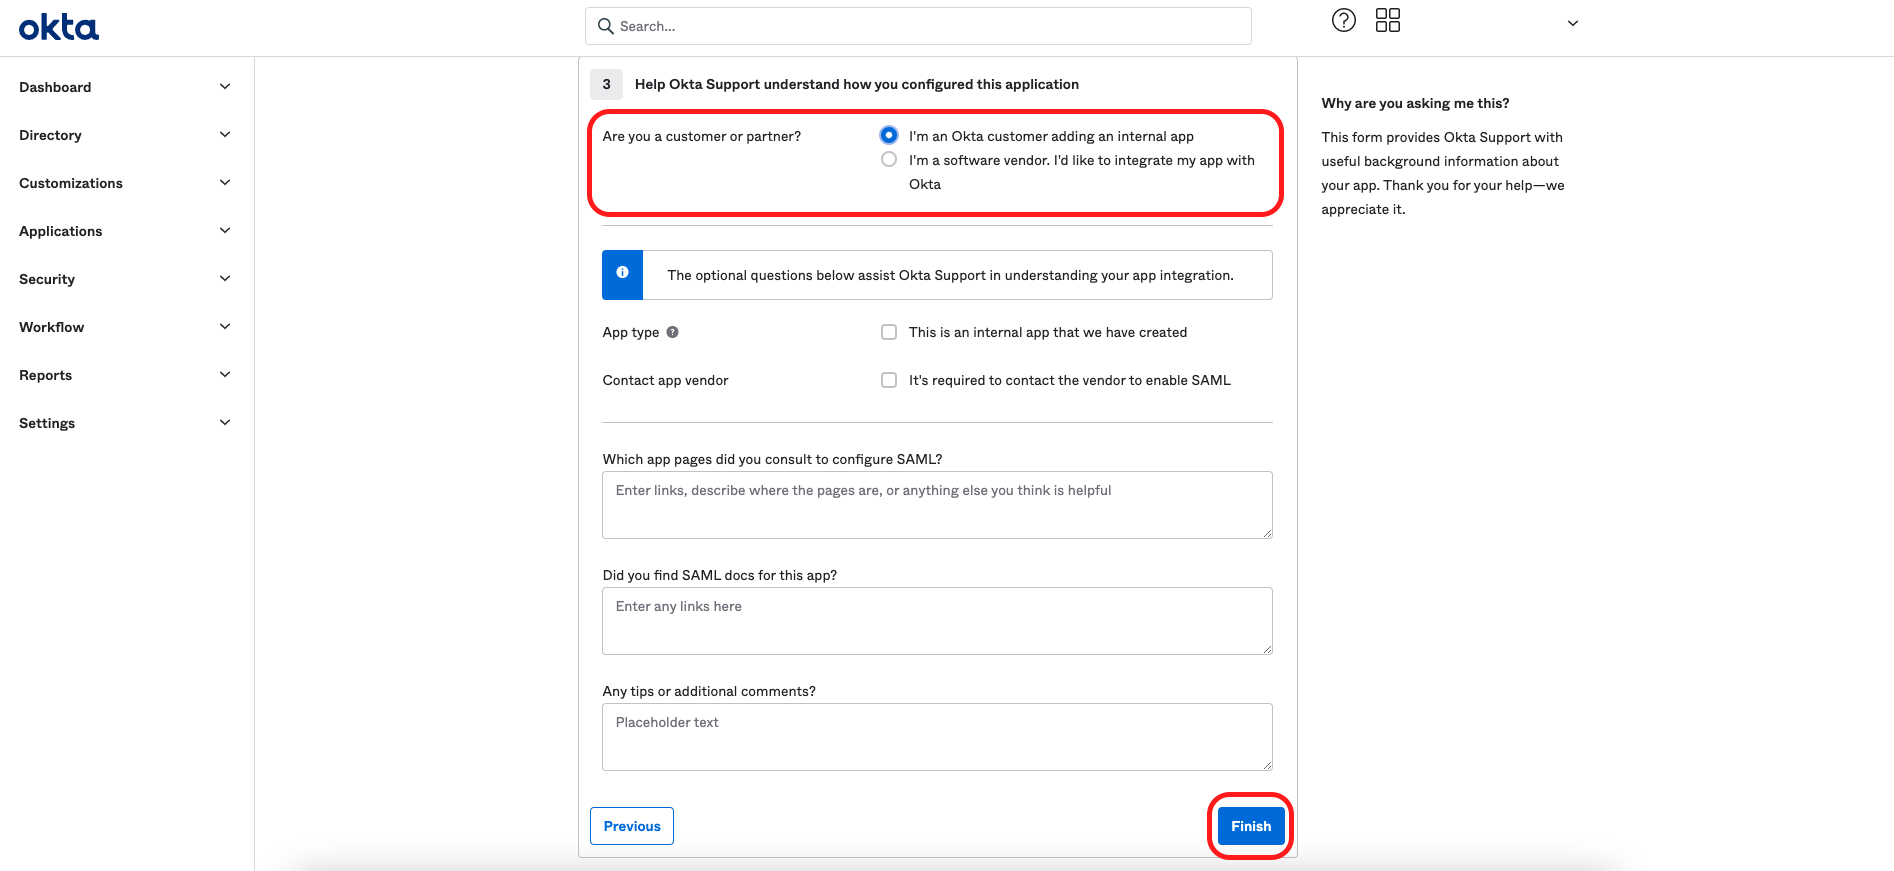
The last step is an optional feedback step for Okta. Select I'm an Okta customer adding an internal app and then select Finish.
-
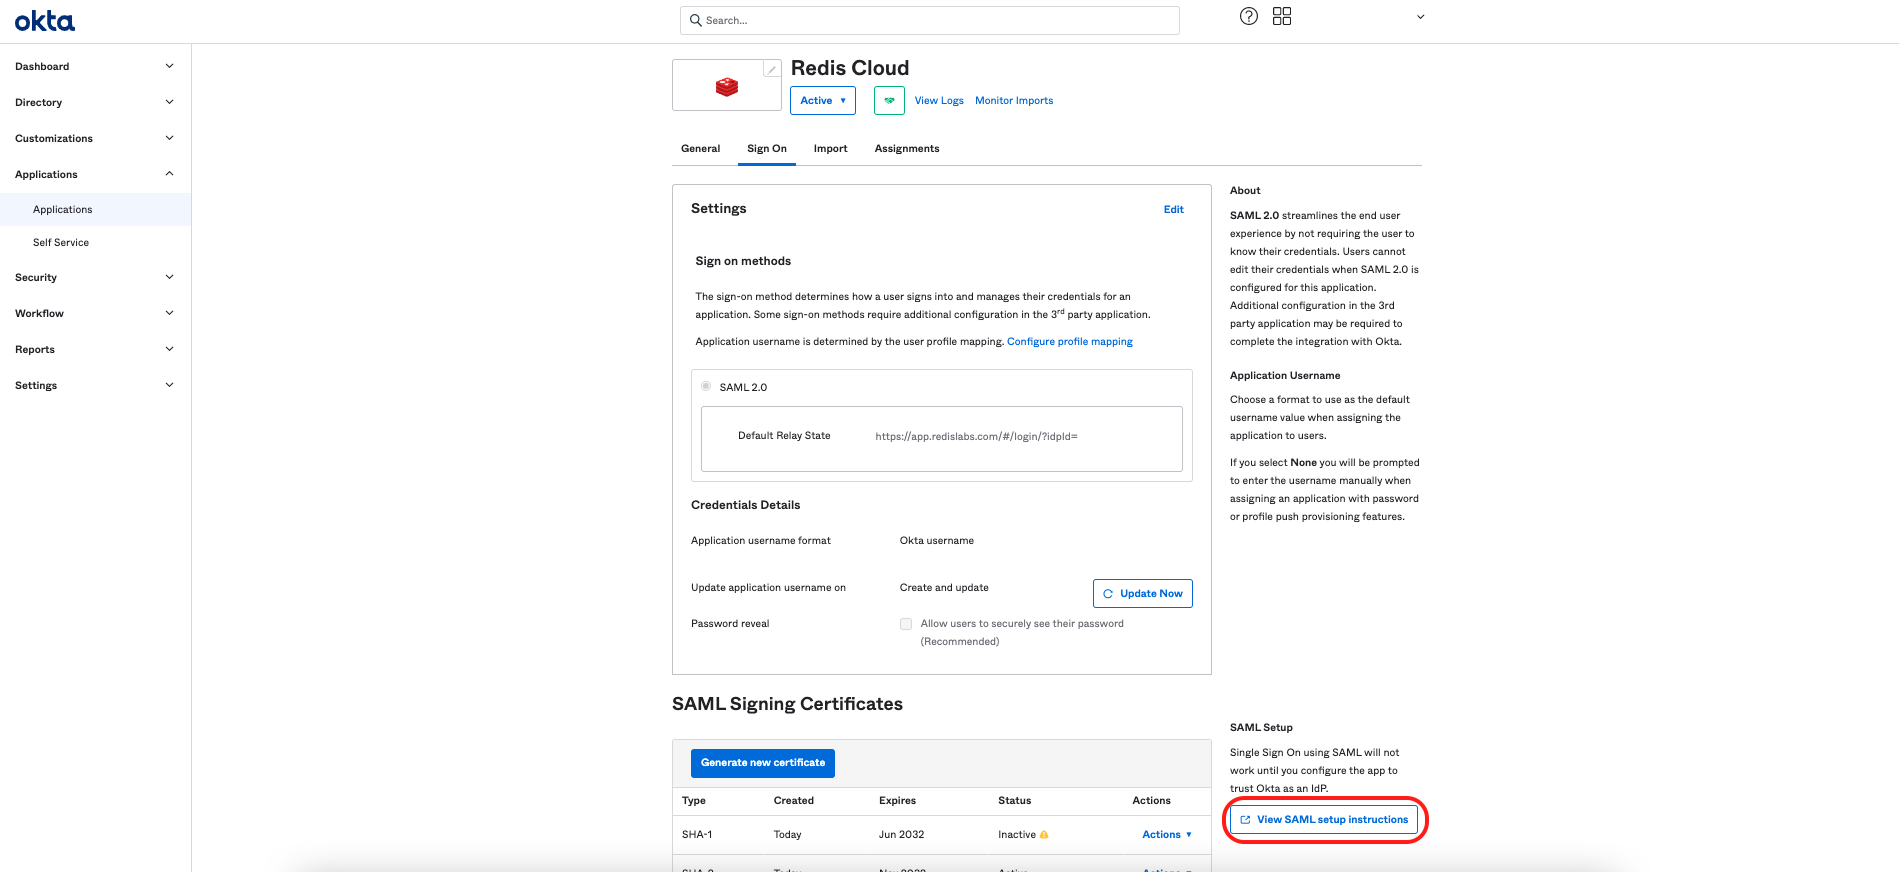
Next, scroll down the page of your newly created app integration and select View Setup Instructions. A new browser window opens, providing the information you need to configure the IdP in Redis Cloud.
Scroll down to Applications > Applications, and note down the following information:
- Identity Provider Single Sign-On URL
- Identity Provider Issuer
- X.509 Certificate
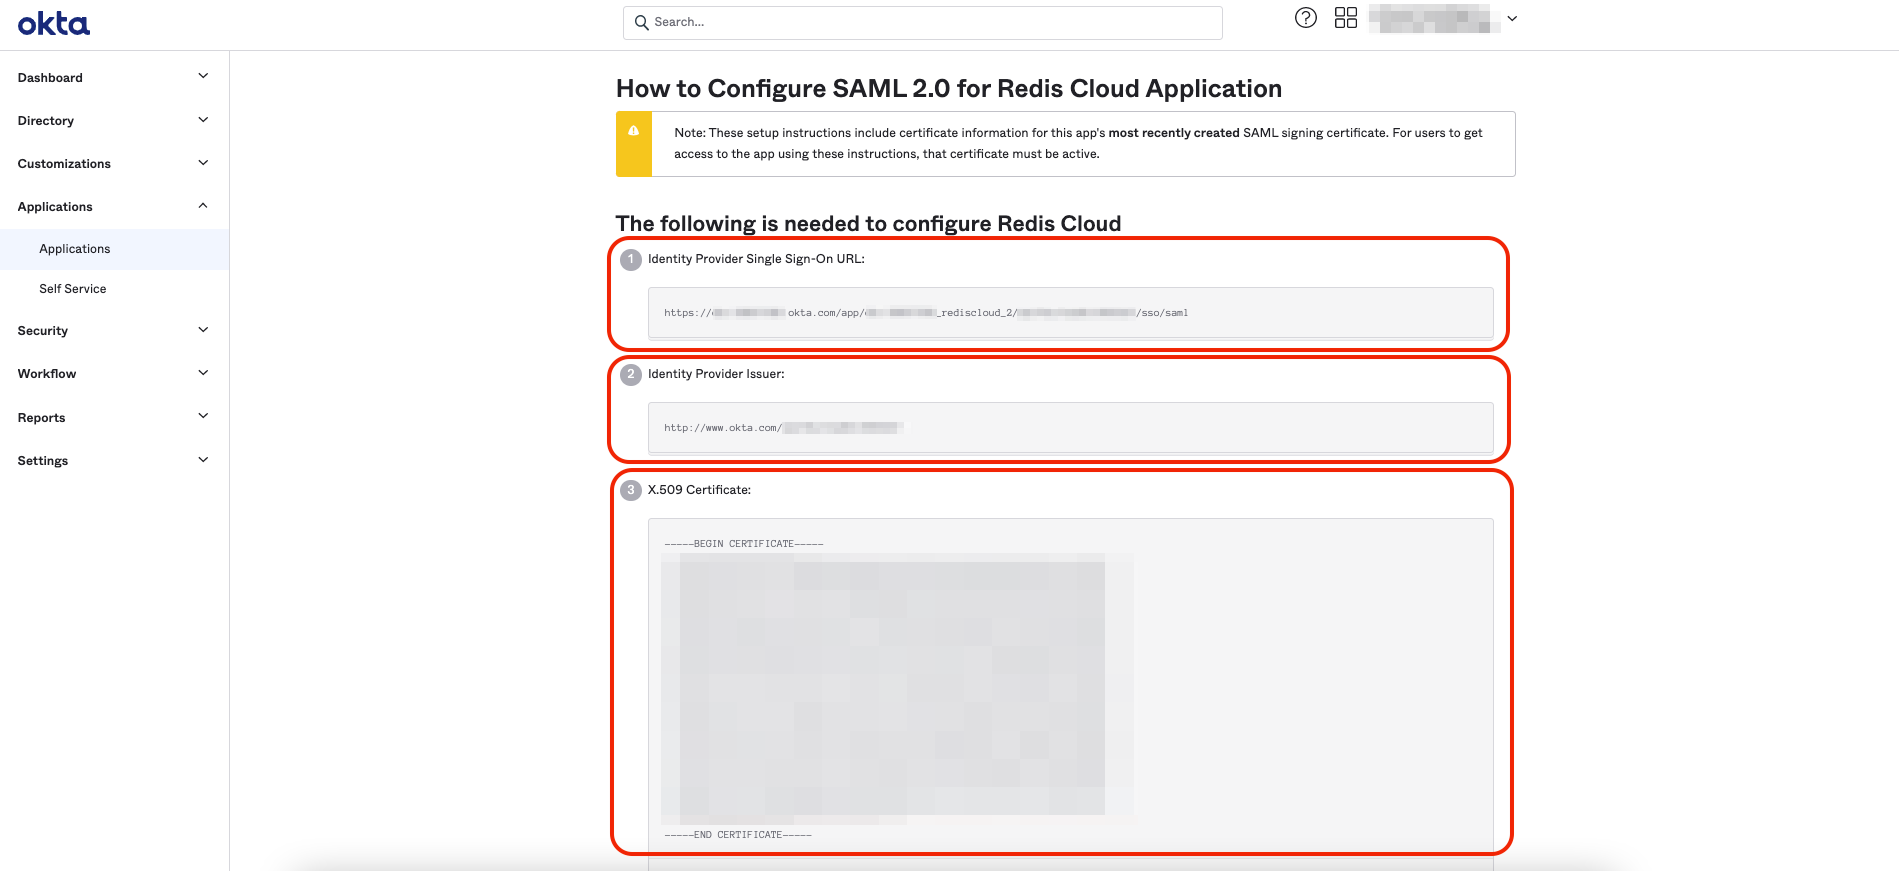
Once you save the information, close the window.
You must also add redisAccountMapping as a custom attribute on the user profile itself, using the Profile Editor. The attribute statement you added above tells Okta which profile field (appuser.redisAccountMapping) to pass in the SAML assertion, but that field doesn't exist until you define it here. Without this step, Okta has no redisAccountMapping value to send, and Redis Cloud can't determine the user's role or account.
To modify the application user profile:
-
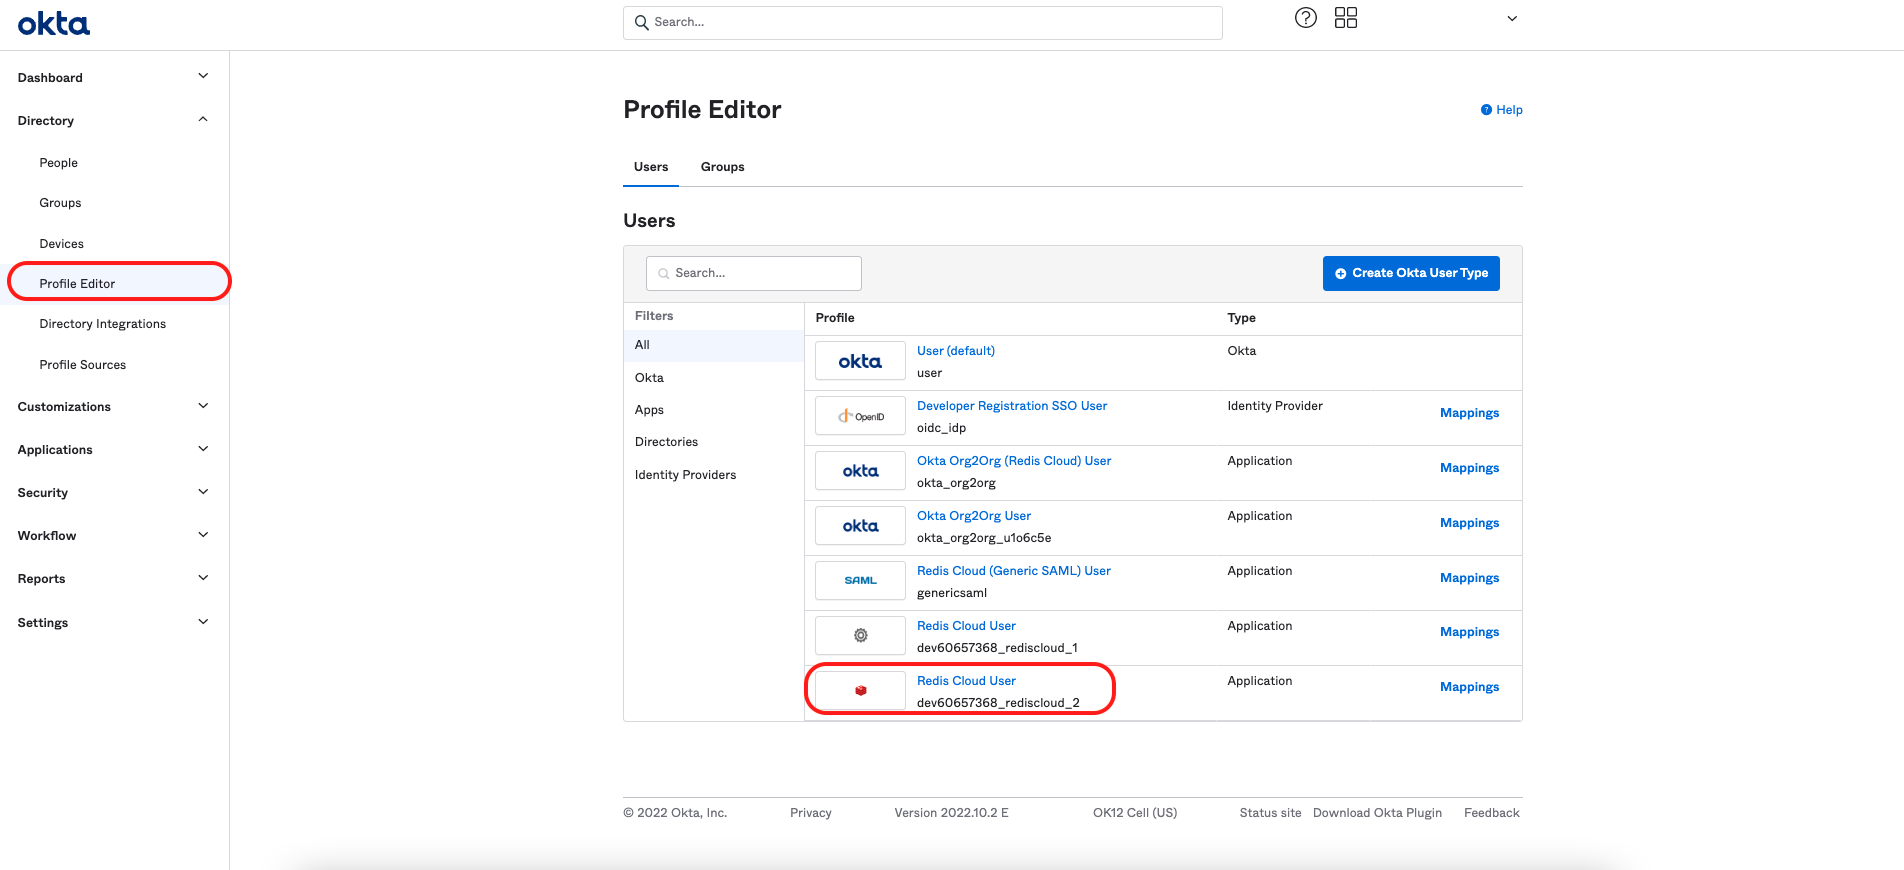
Go to Directory > Profile Editor in the left menu, and select Redis Cloud User.
-
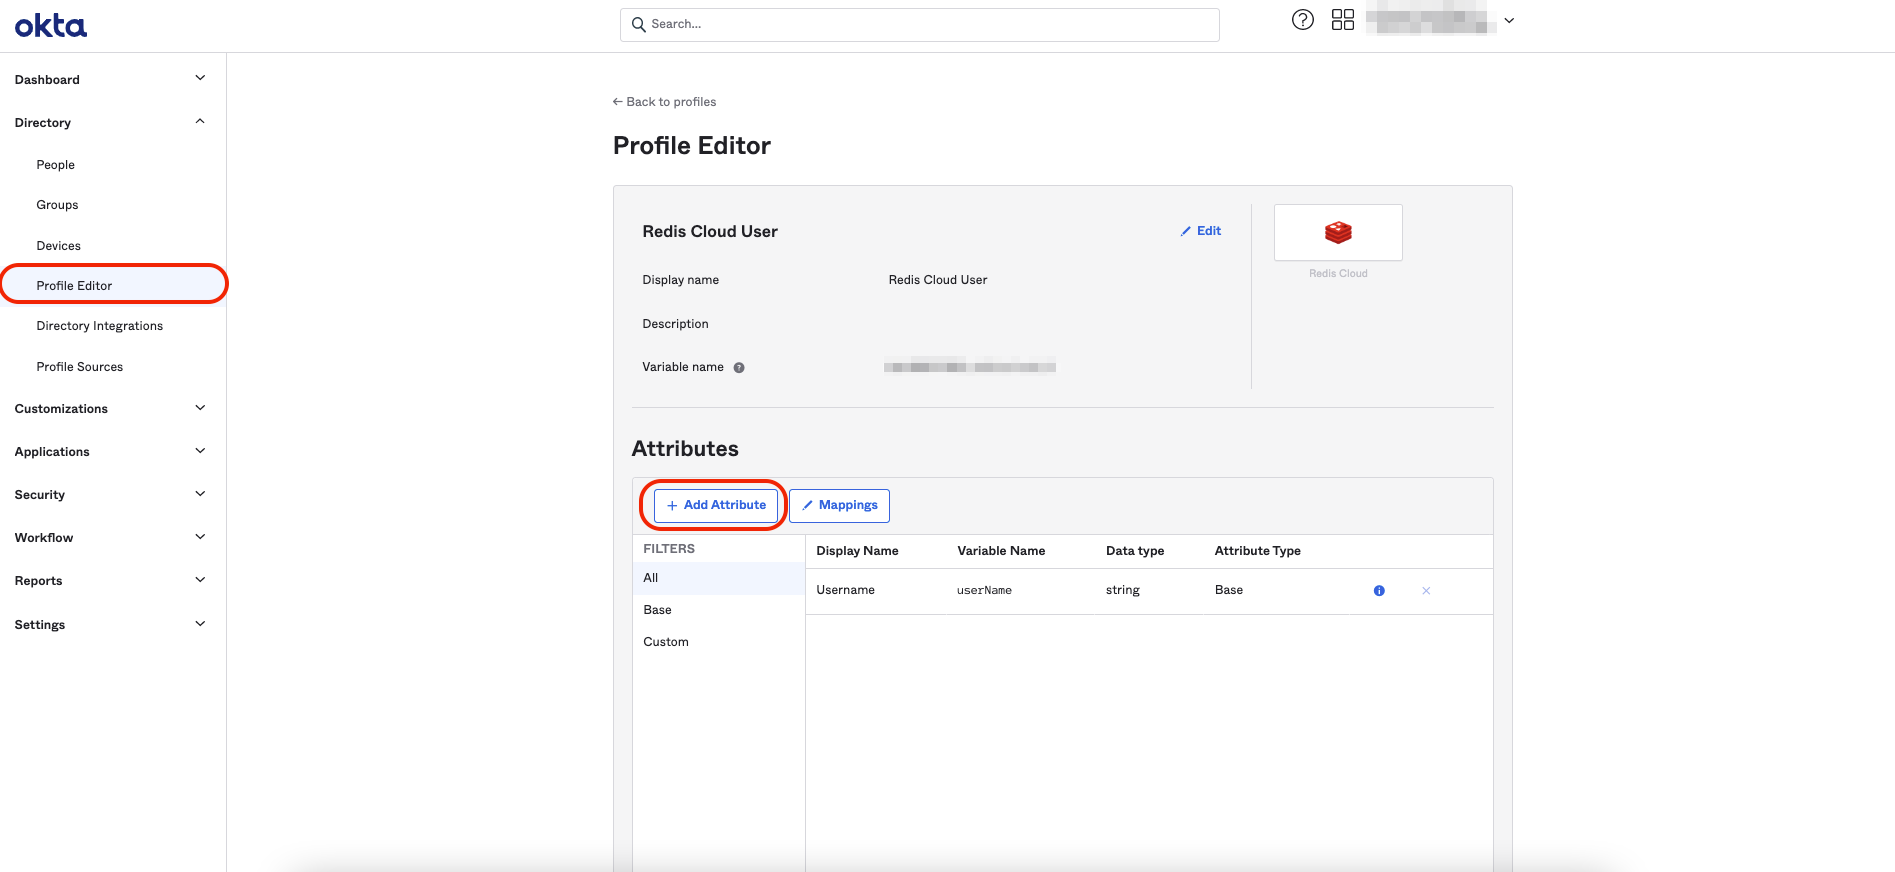
Add the custom attribute to your user profile to specify which Redis Cloud role the user has and on which account. Select Add Attribute.
-
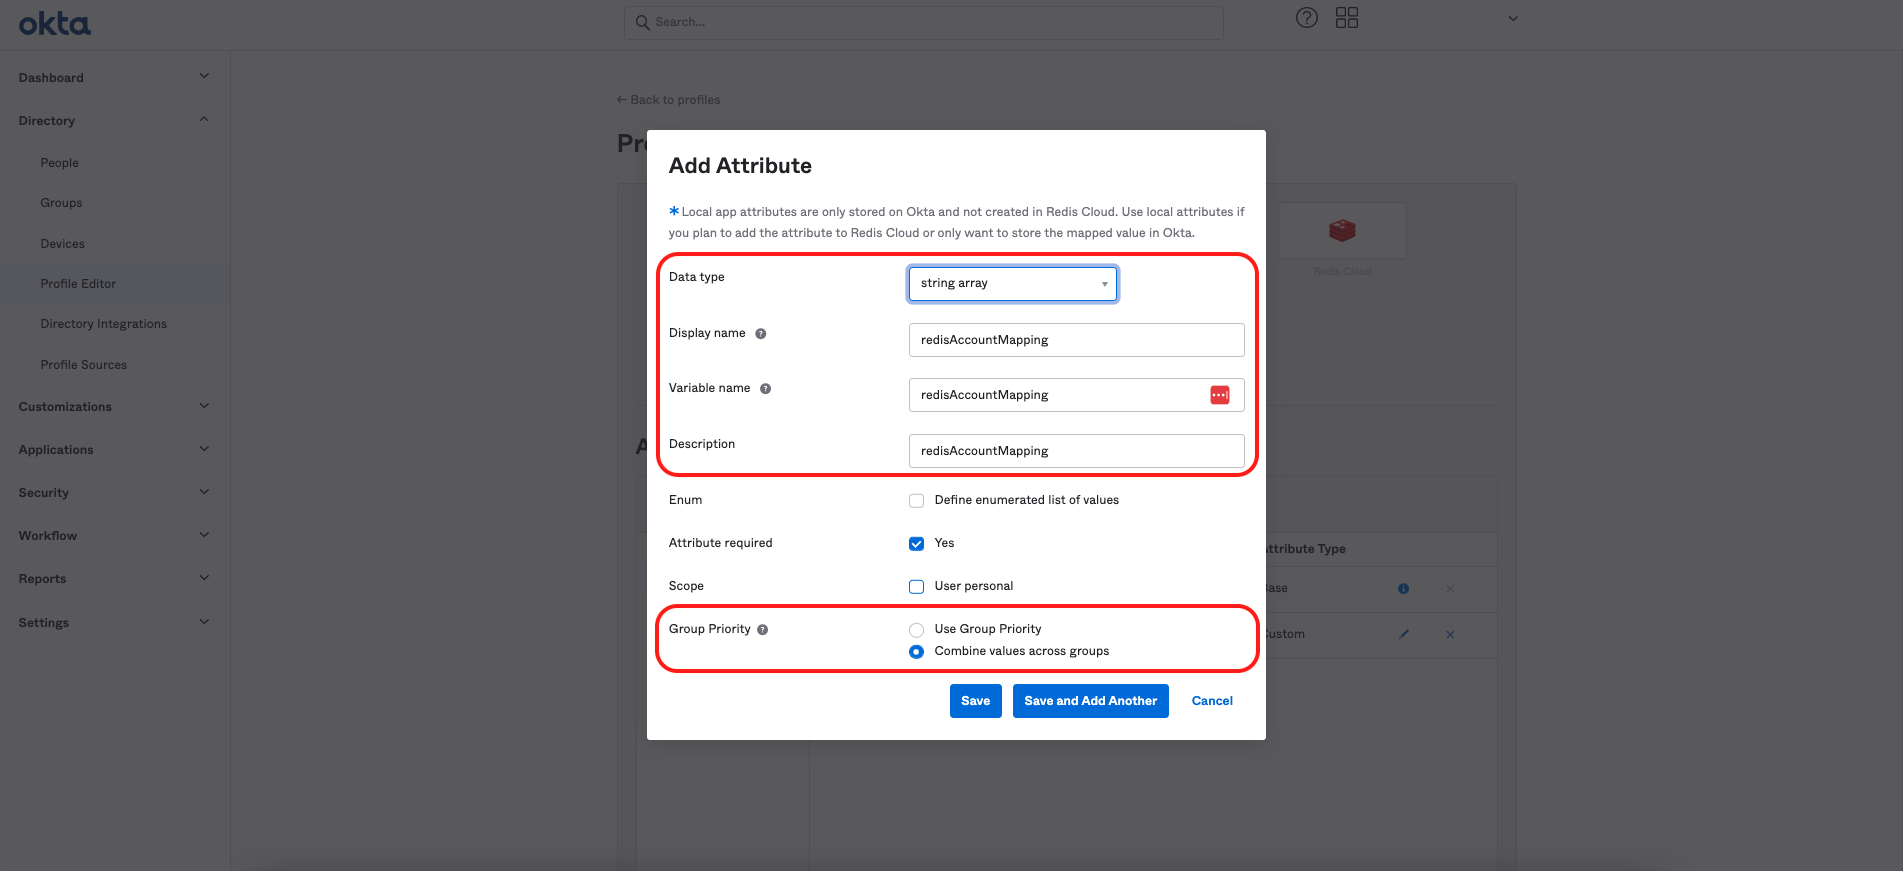
Add this information for the new custom attribute.
- Data type:
string array - Display name:
redisAccountMapping - Variable name:
redisAccountMapping - Description:
redisAccountMapping - Attribute required:
Yes - Group priority:
Combine values across groups
- Data type:
-
Once you add the attribute, it appears in the list of attributes for the profile.

Step 2: Create a group and assign the application
Now that your SAML IdP is configured, create an Okta group and assign users to the Redis Cloud application.
Create the group
-
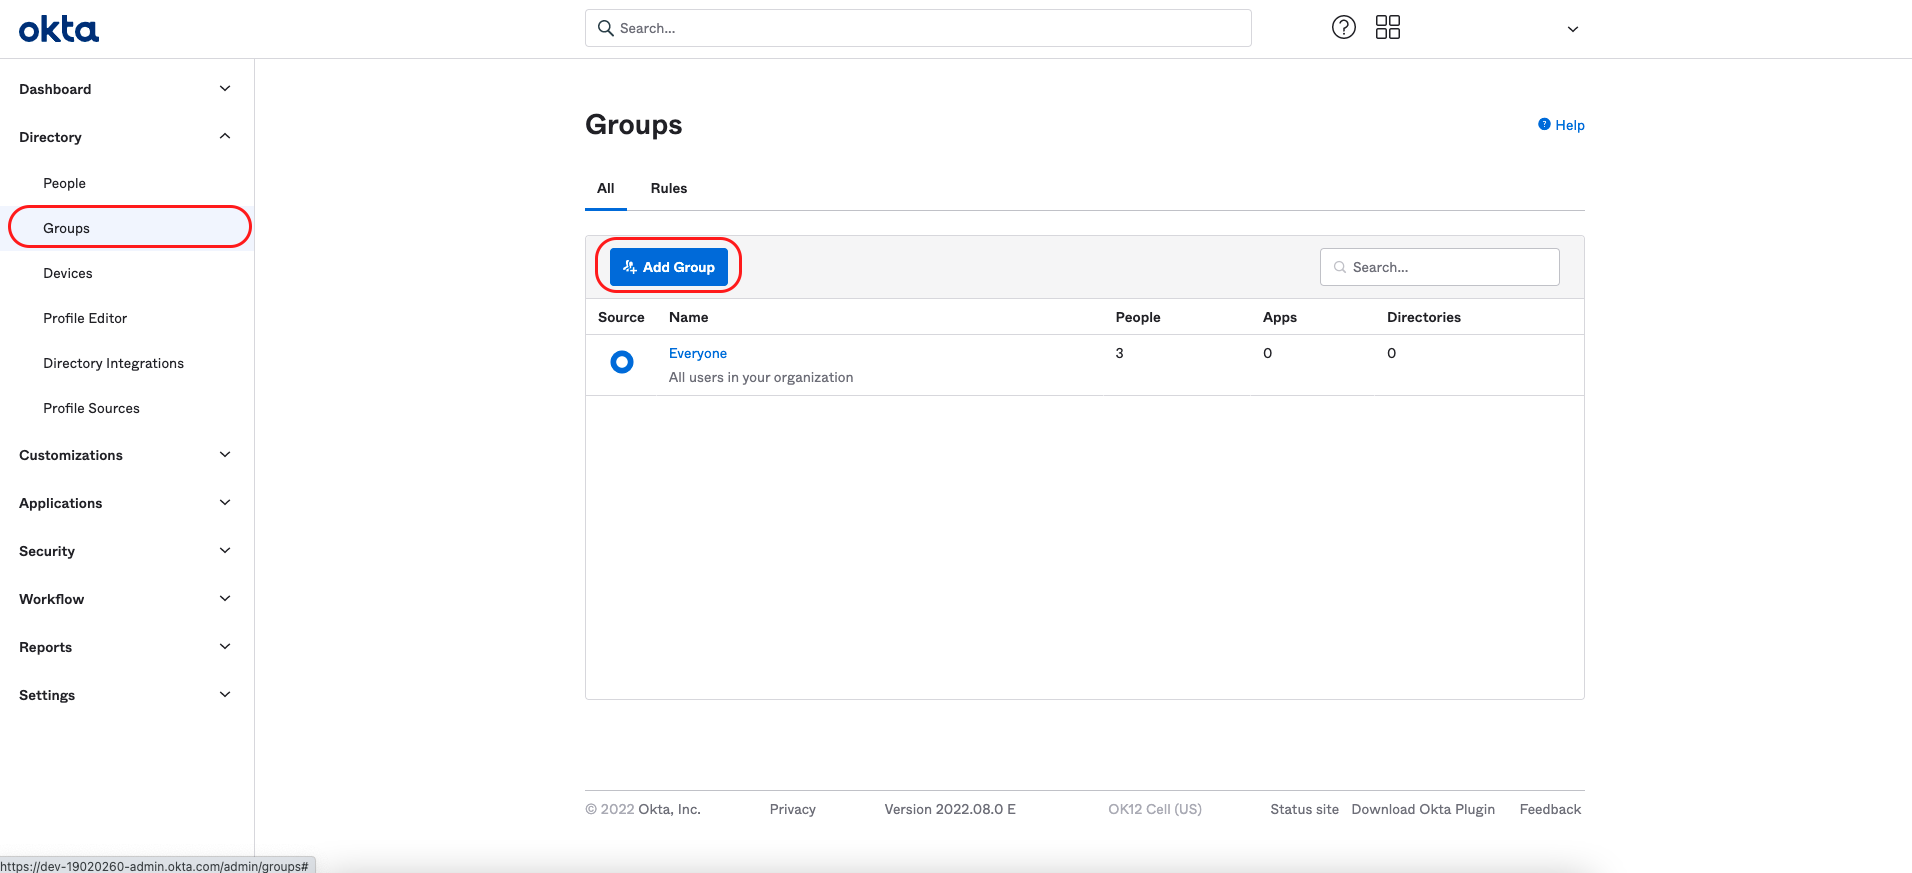
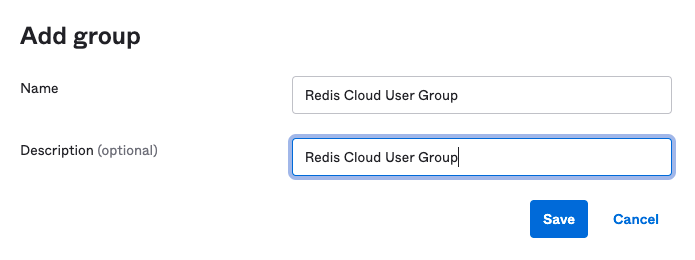
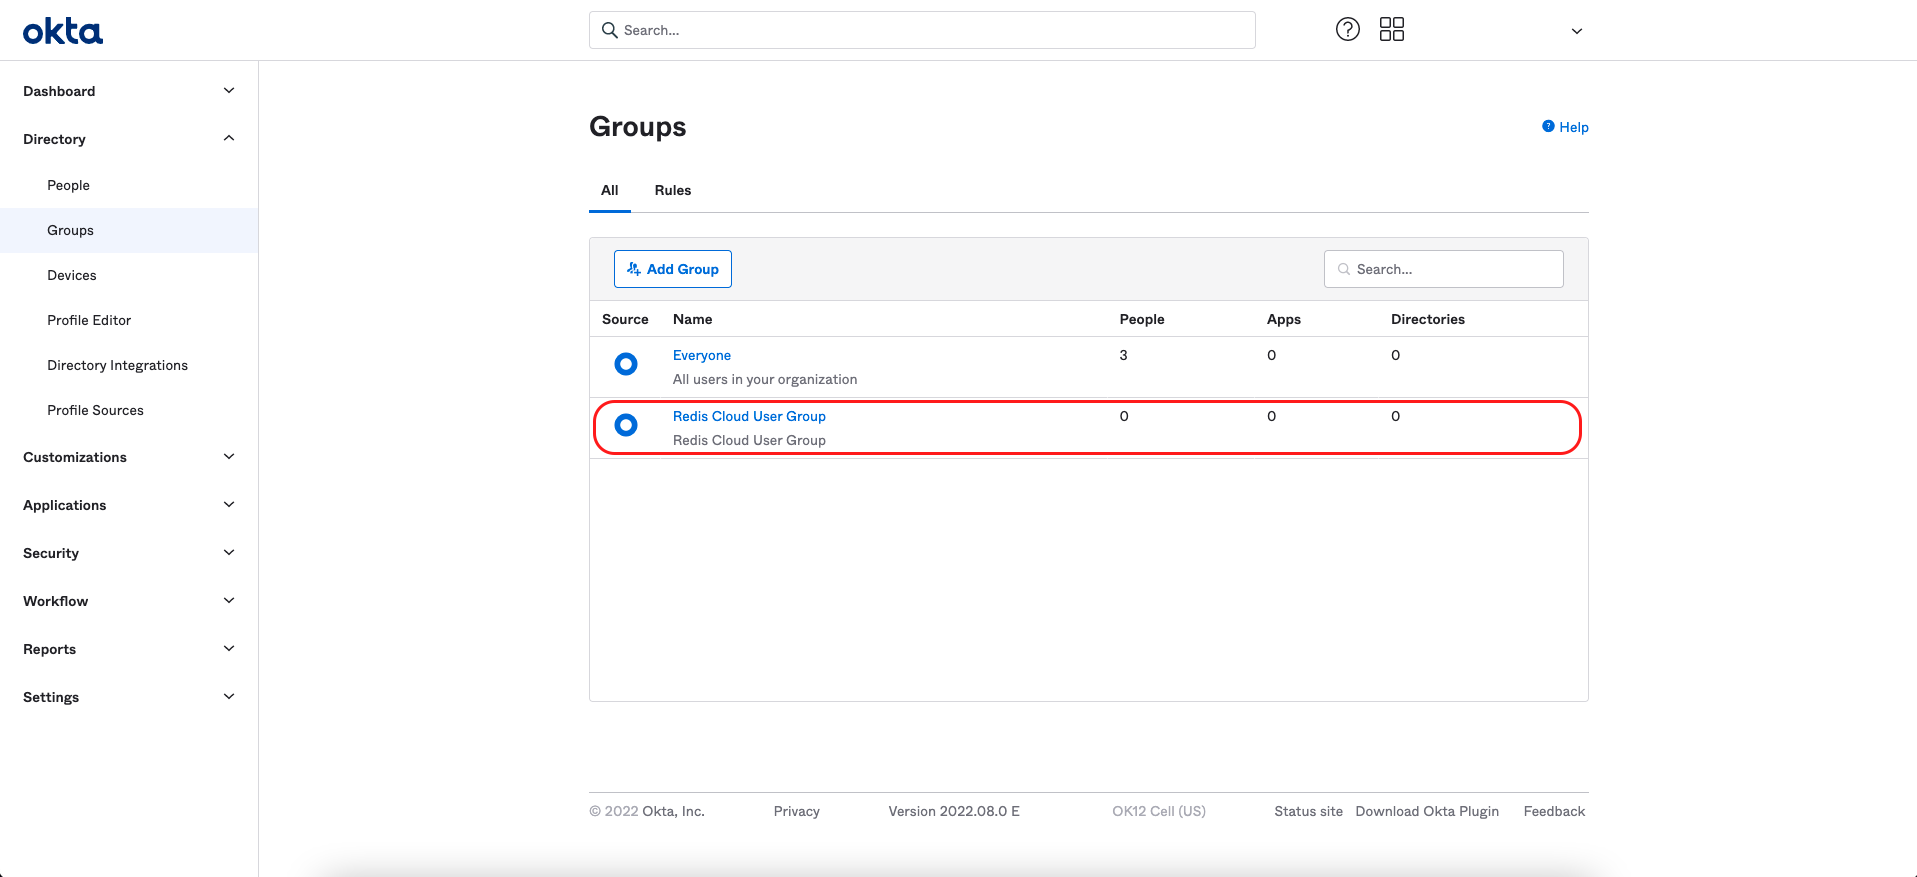
In the left menu, select Directory > Groups, then select Add group.
-
Complete Name and Description, then click Save.
Assign users to the group
-
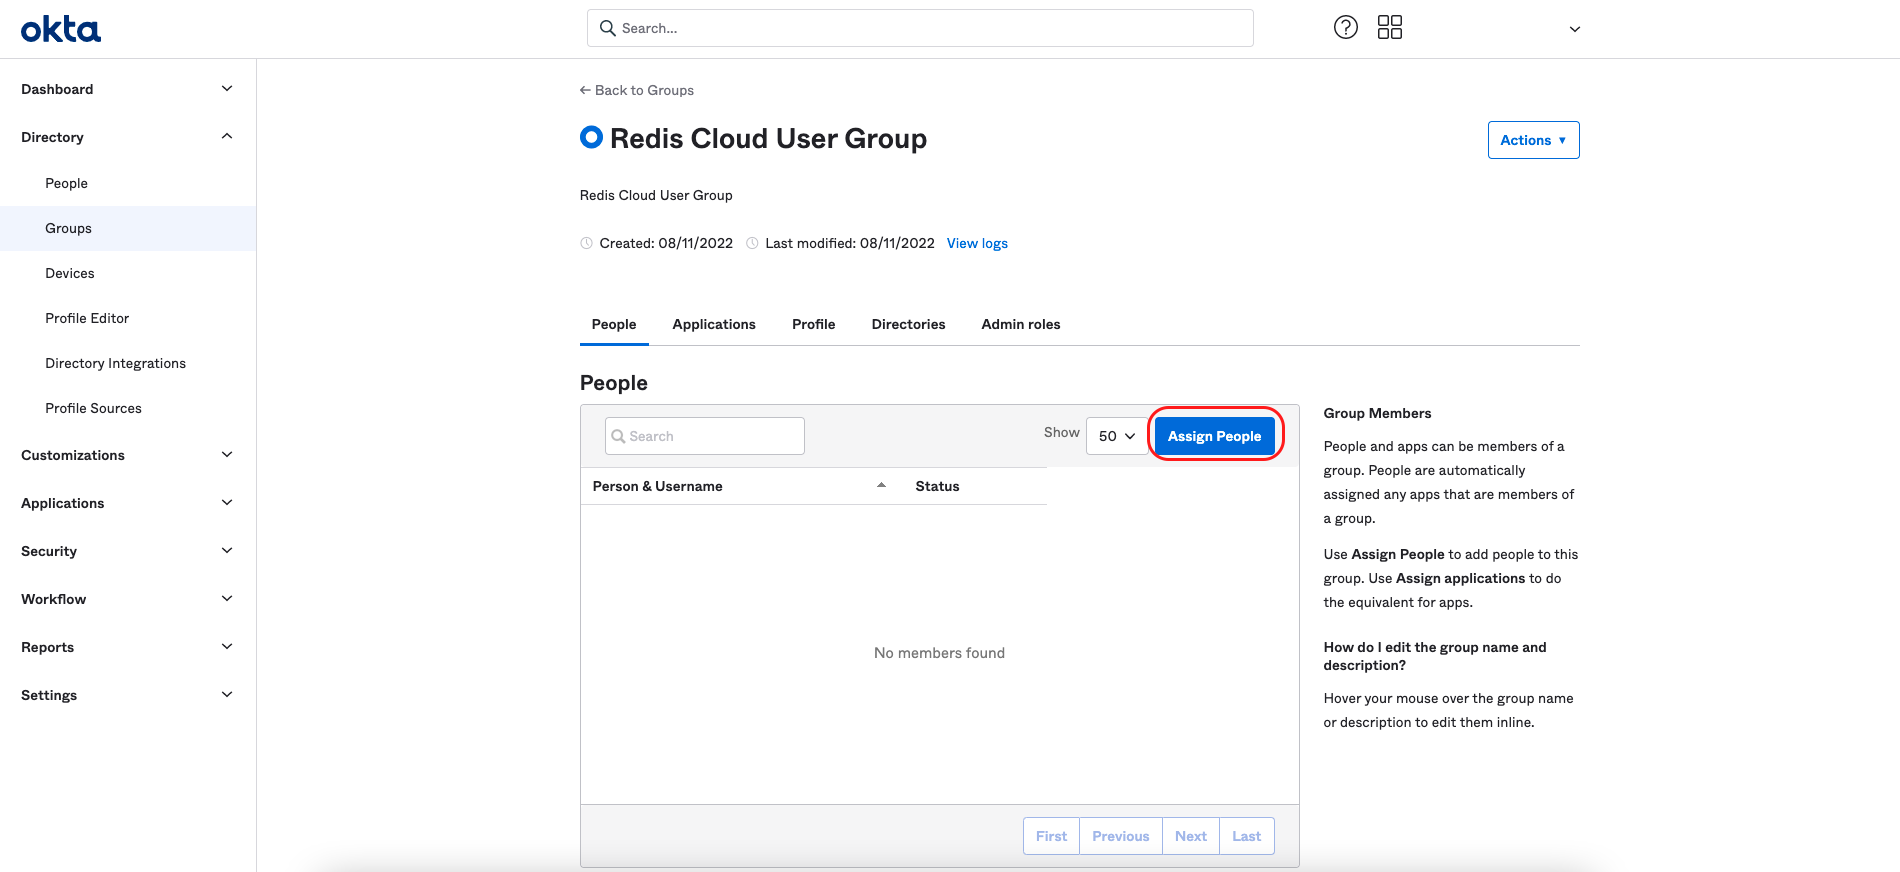
Select the group, then select Assign people.
-
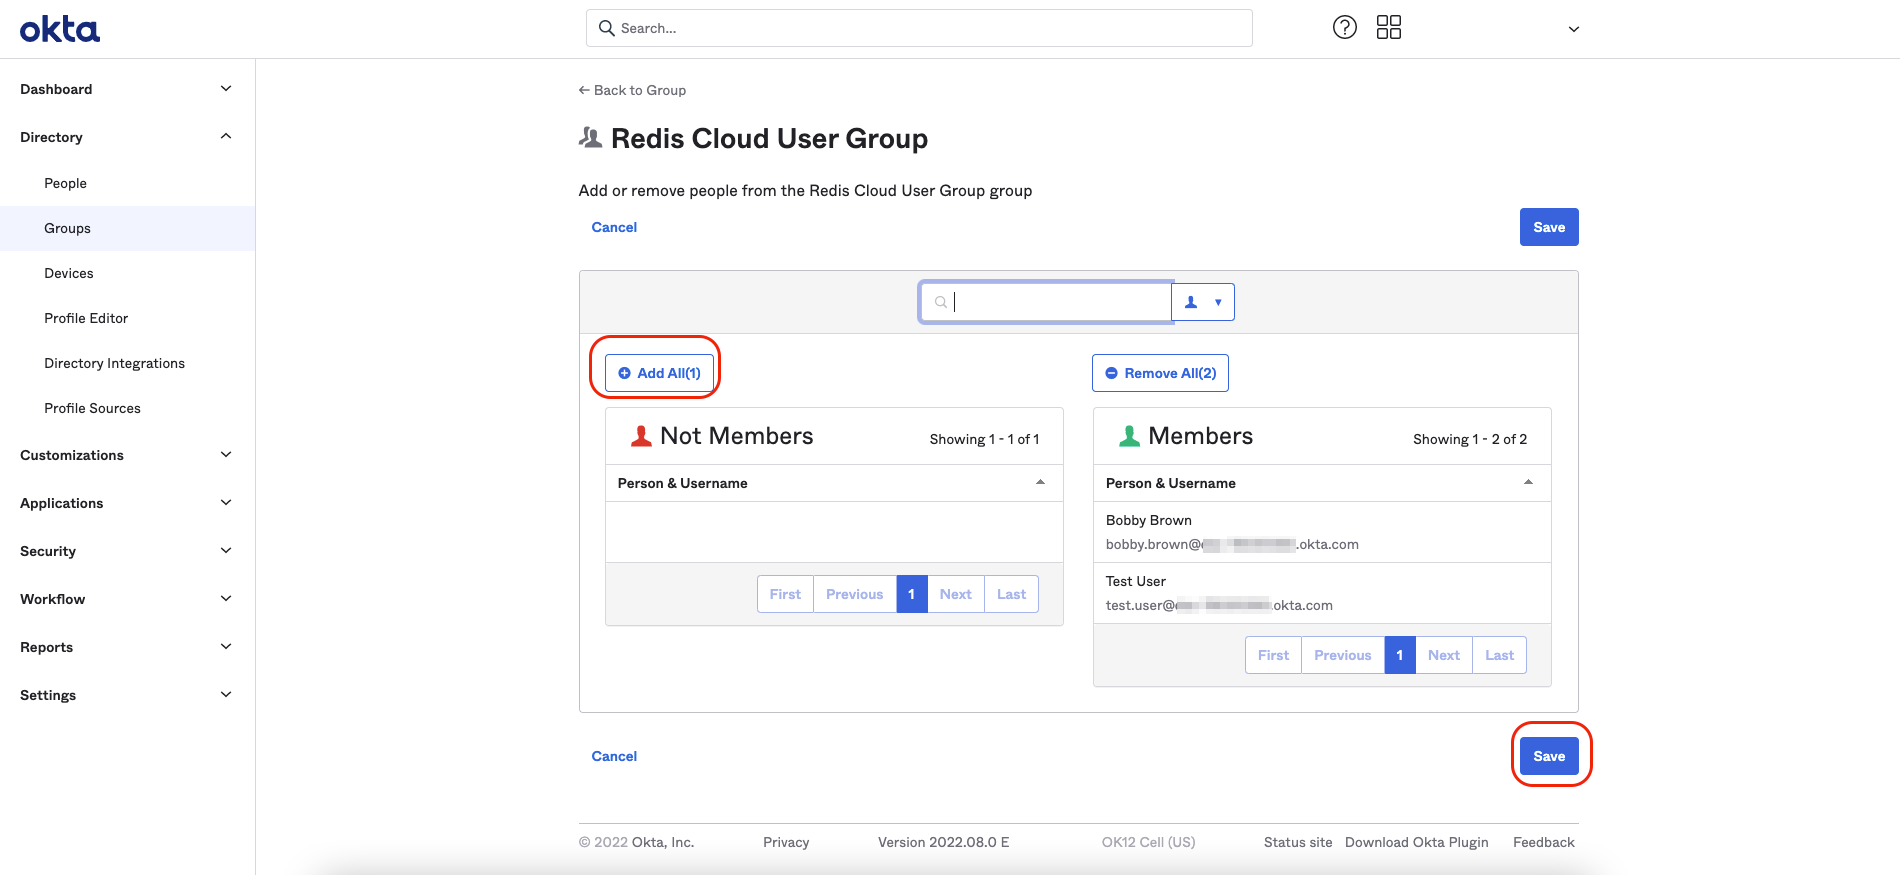
For each user you want to add to the group, highlight the user in the table and select +. You can also select Add all to add all users. Once you add all the users to your group, select Save.
Assign the application to the group
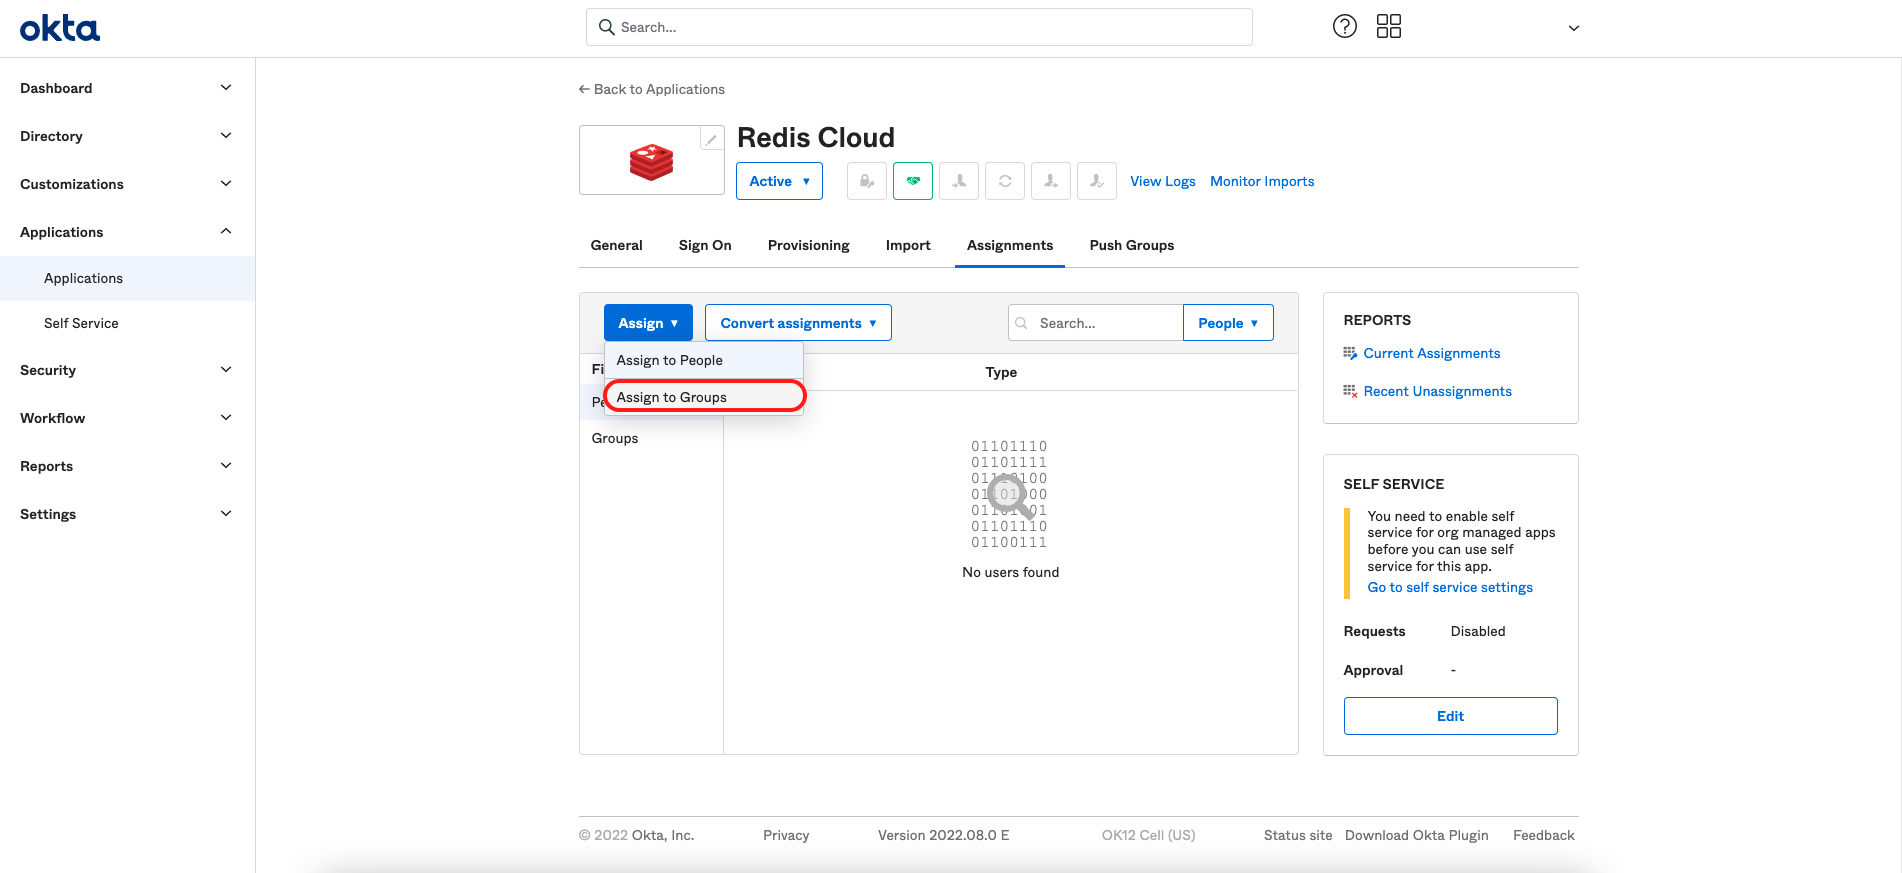
Now that your group is populated with its users, you can assign the SAML integration application to your group. From Applications > Applications > Redis Cloud:
-
Select Assign to groups menu item.
-
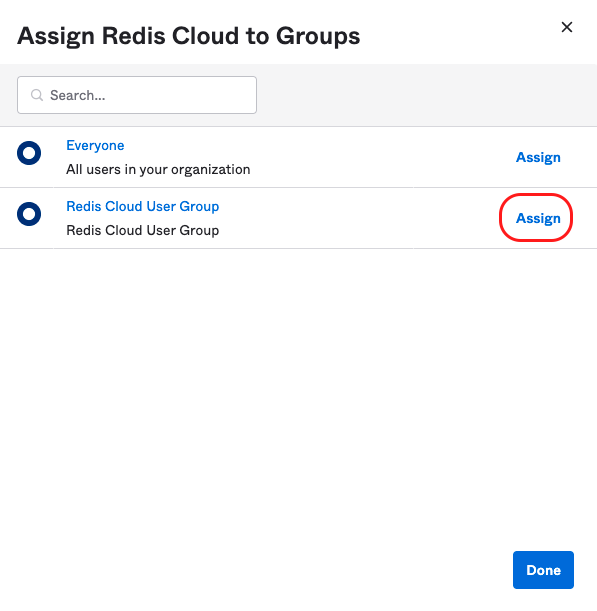
In the Redis Cloud User Group, select Assign.
-
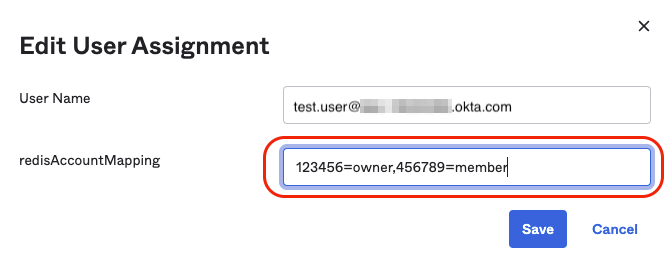
Define the Redis account mapping string default for this group and select Save and Go Back. The key-value pair consists of your Redis Cloud Account ID found in the account settings and the lowercase role name (owner, member, manager, billing_admin, or viewer) — for example,
1937217=viewer. Select "Done".Note:Role values must be lowercase. A value like1937217=Vieweror1937217=VIEWERis rejected.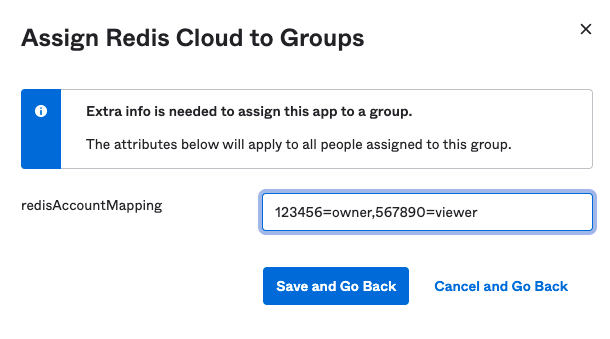
The mapping field has now been defined as a default for each member of the group.
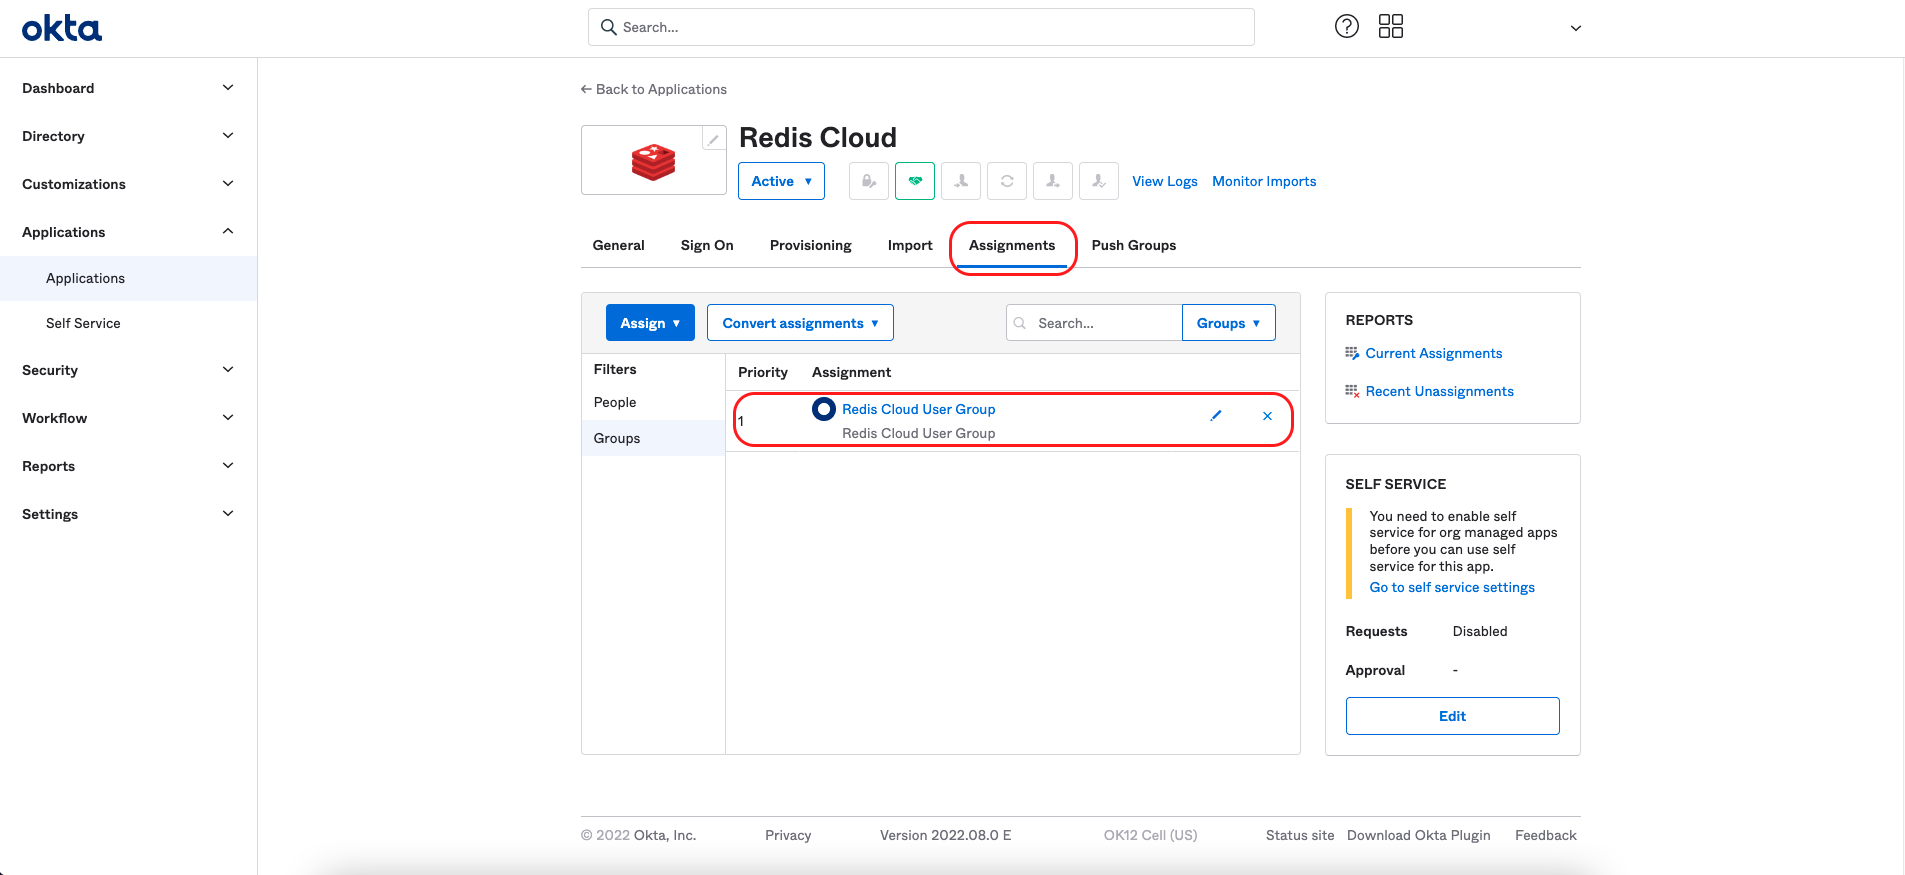
Edit the mapping field for the group
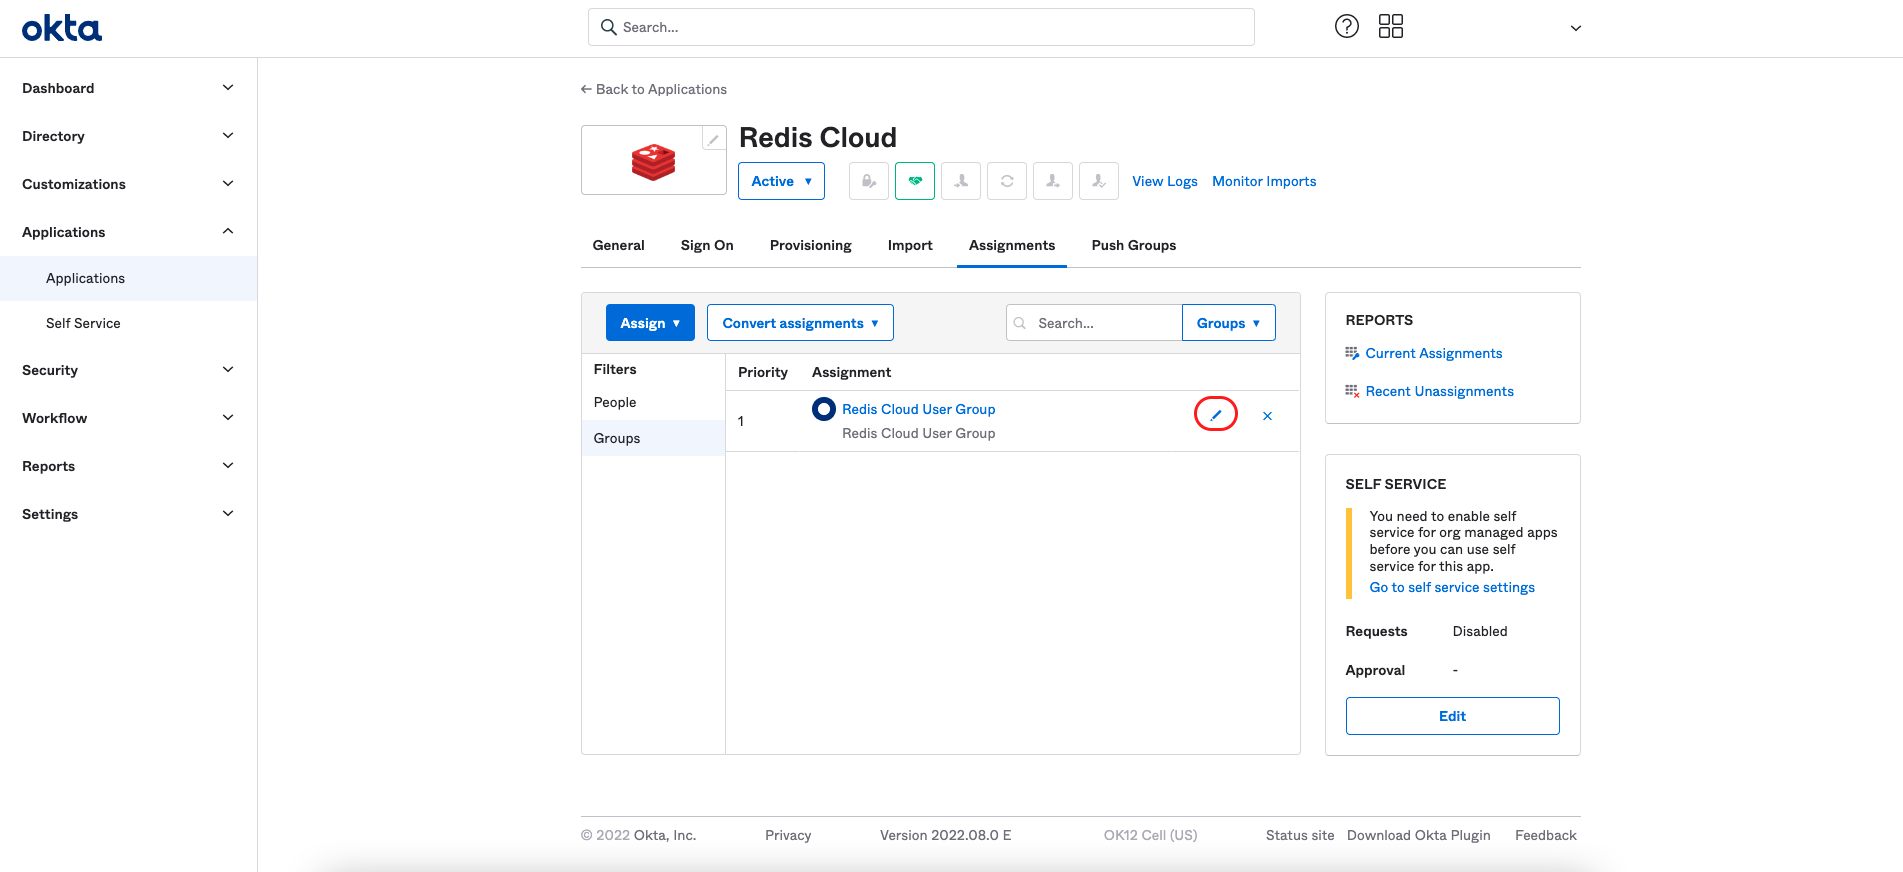
To modify the Redis mapping field, select the pencil icon of the Redis Cloud group in the Redis Cloud application screen.
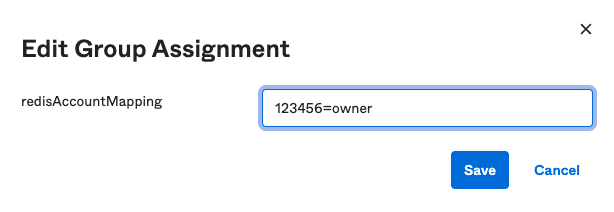
You can modify the mapping field for the whole group on the edit screen that appears.
Edit the mapping field for a specific user
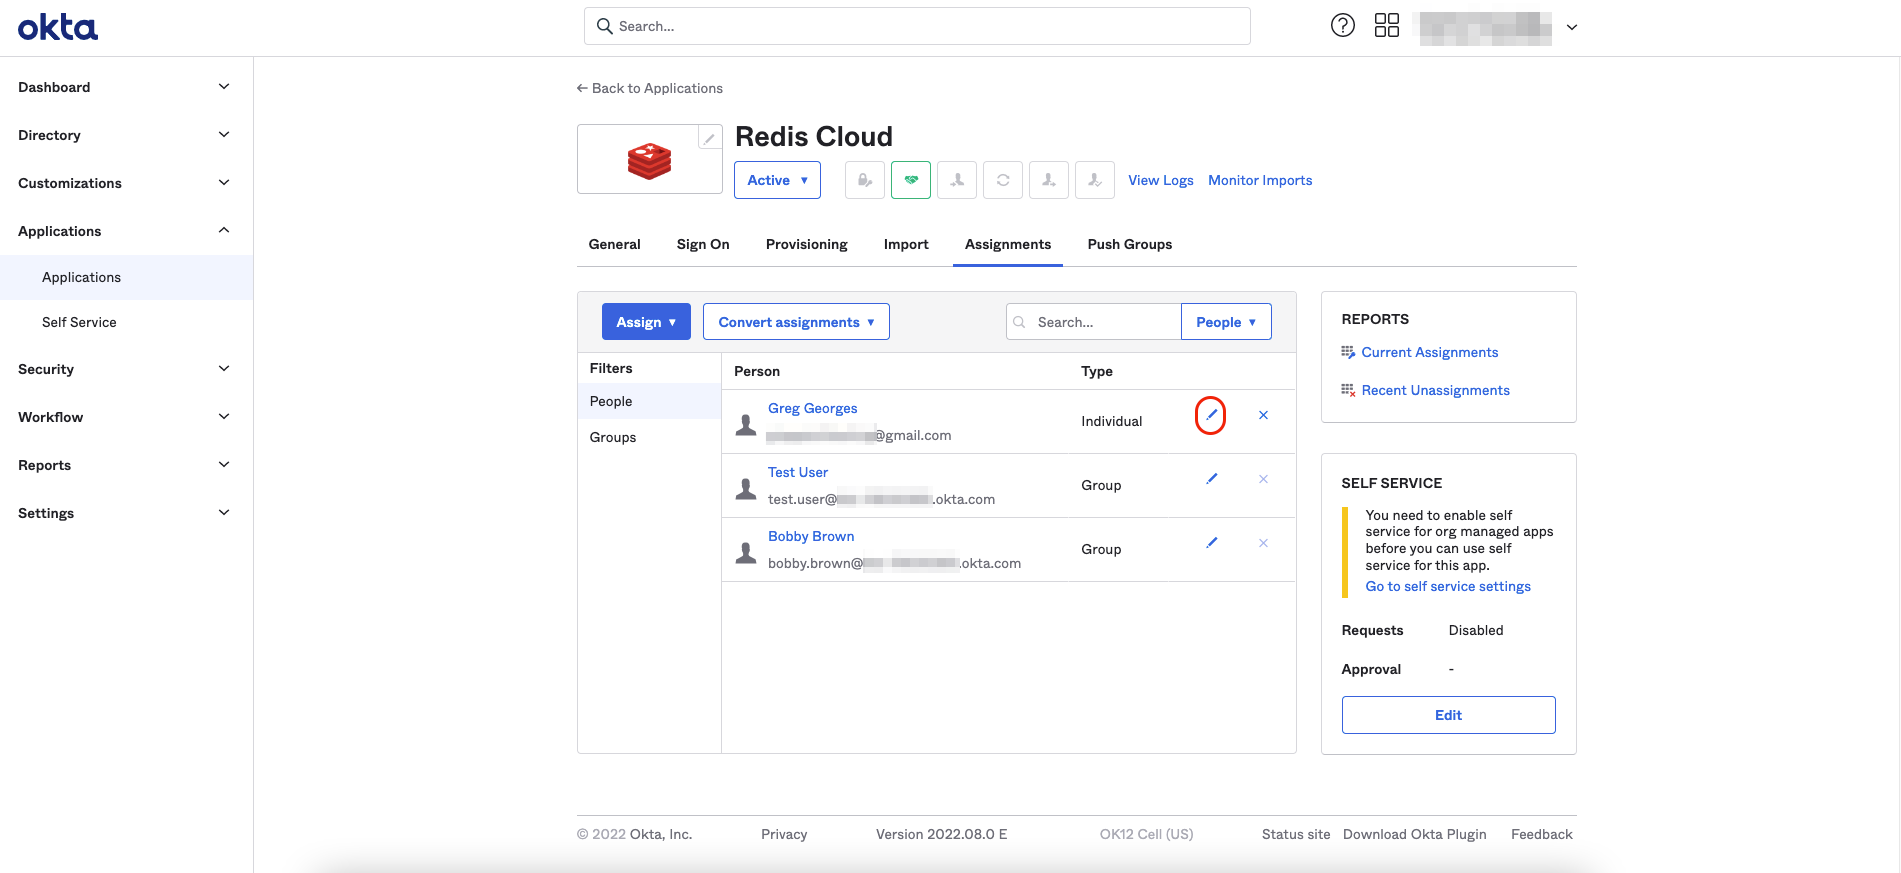
To override the Redis mapping field at an individual user level, select the People menu, and then the pencil icon of the person whose field you want to modify.
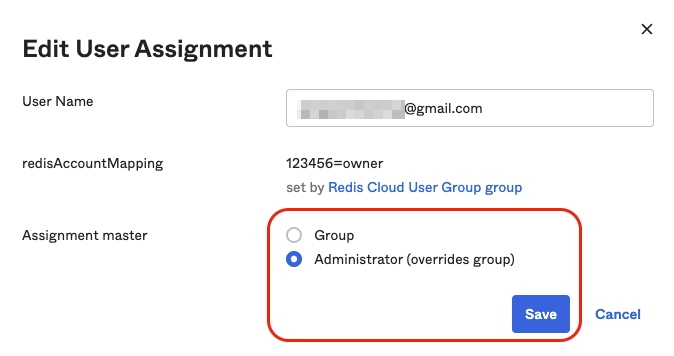
Set the user's Assignment master to Administrator, enabling the group's policy override. Select Save.
The user's Type is set to Individual.
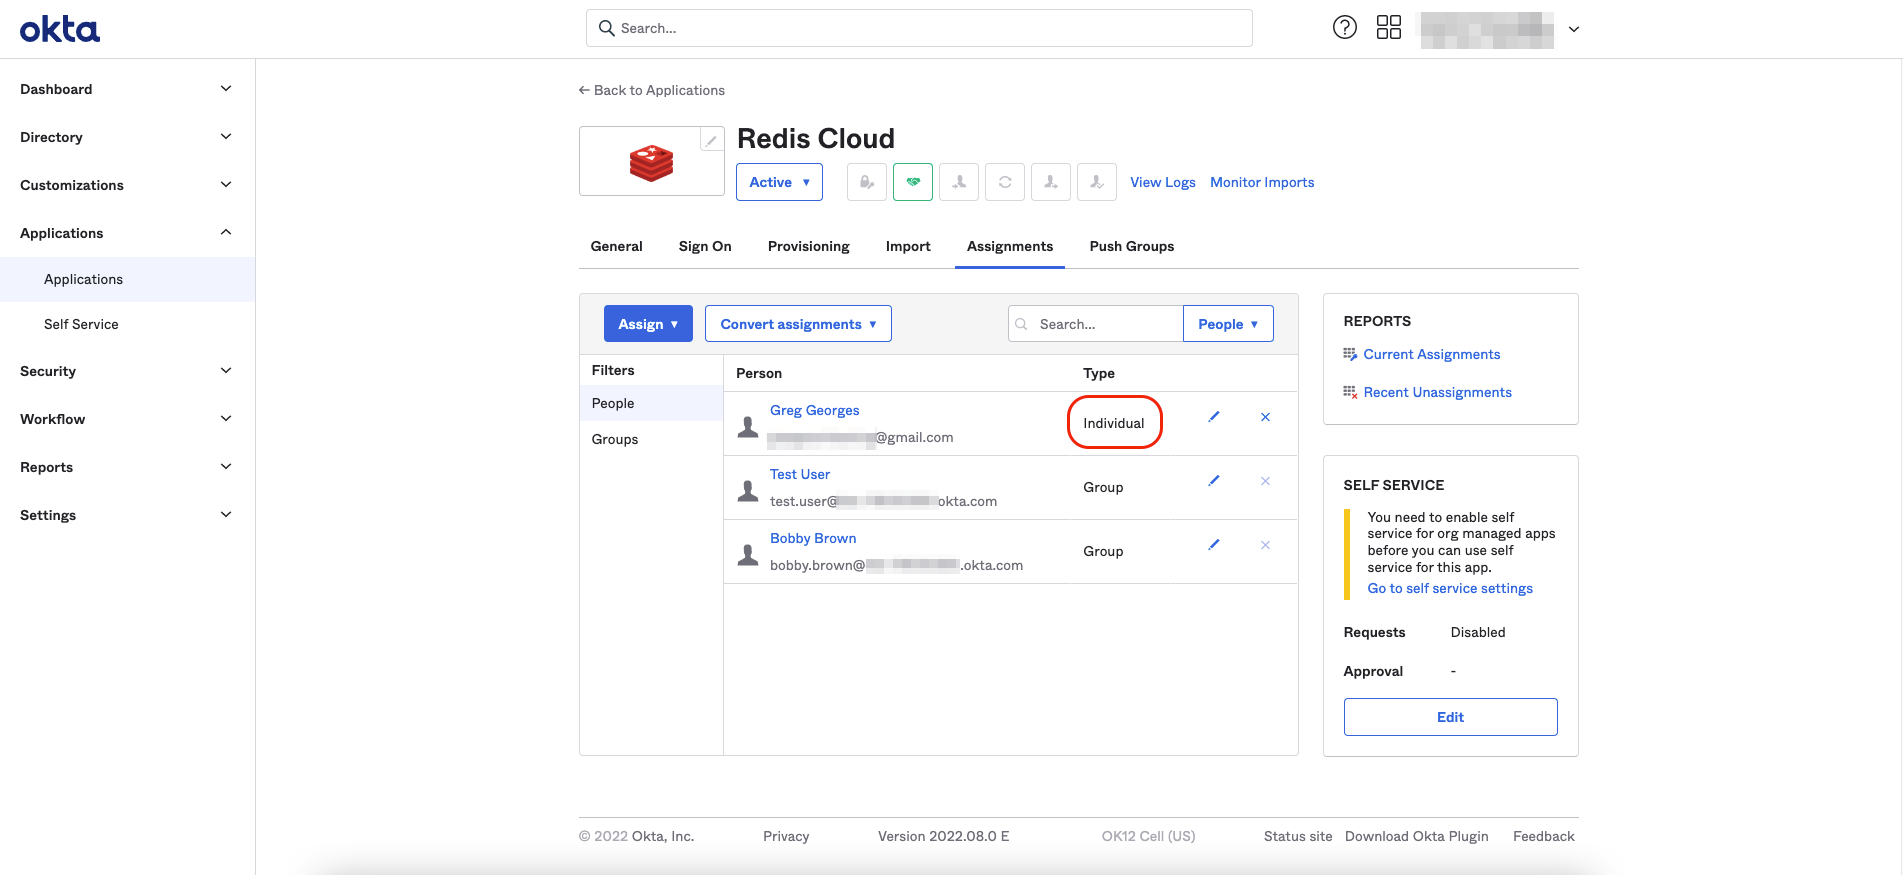
On the screen that appears, select the pencil icon of the user to modify the Redis mapping field.
Then, edit the user assignment.
Step 3: Configure SAML support in Redis Cloud
Now that you have a test IdP server ready as well as your user group, configure support for SAML in Redis Cloud.
Sign in to Redis Cloud
Sign in to your account on the Redis Cloud console.
Activate SAML in Access Management
To activate SAML, you must have a local user (or social sign-on user) with the owner role. If you have the correct permissions, you will see the Single Sign-On tab.
ACCOUNT_ID=owner in their redisAccountMapping value, where ACCOUNT_ID is the Redis Cloud account being configured. Activation fails if this user's mapping doesn't grant the owner role on that account.-
Fill in the information you saved in step 6 in the setup form, including:
- IdP Server URL: Identity Provider Single Sign-On URL
- Issuer: Identity Provider Issuer
- Assertion signing certificate: X.509 Certificate
Note:Paste the X.509 certificate exactly as Okta provides it. Don't add-----BEGIN CERTIFICATE-----/-----END CERTIFICATE-----headers unless the Redis Cloud UI specifically asks for them.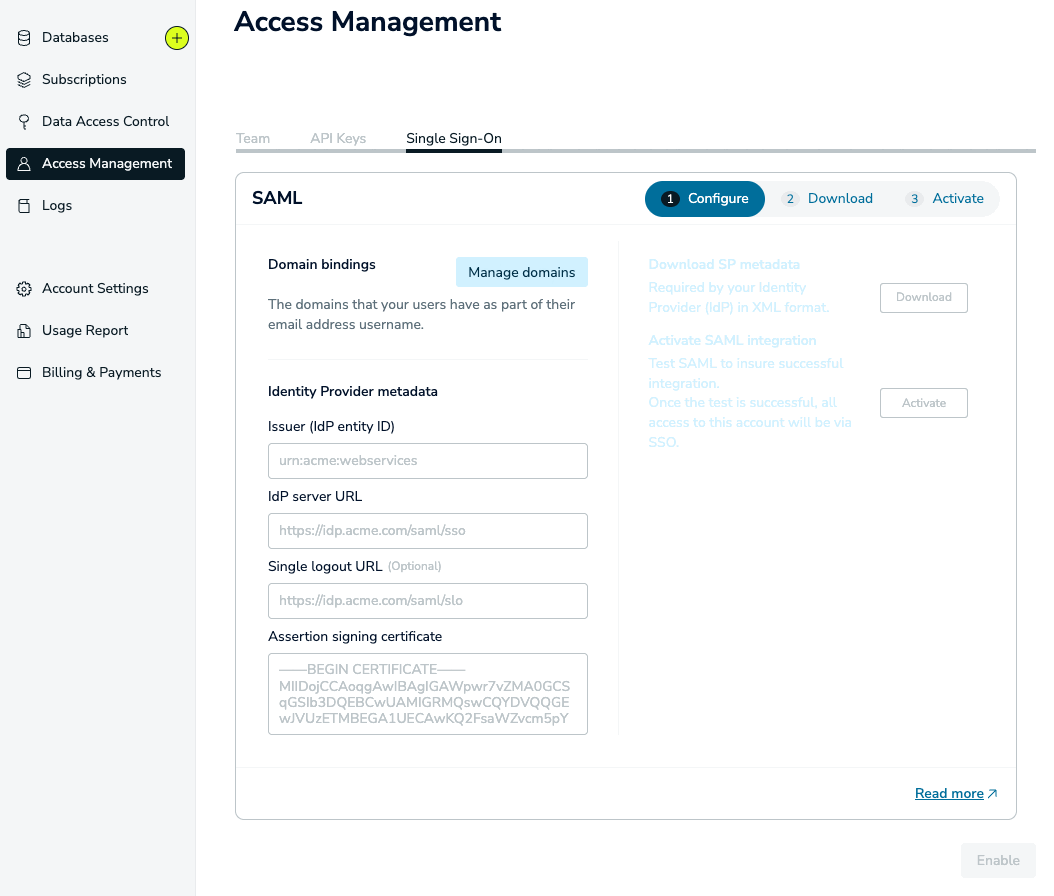
-
Select Enable and wait a few seconds for the status to change. You are then able to download the service provider (SP) metadata. Save the file to your local hard disk.

-
Open the file in any text editor. Save the following text from the metadata:
- EntityID: The unique name of the service provider (SP)

- Location: The location of the assertion consumer service

-
Return to Okta, select Applications > Redis Cloud > General and select Edit.
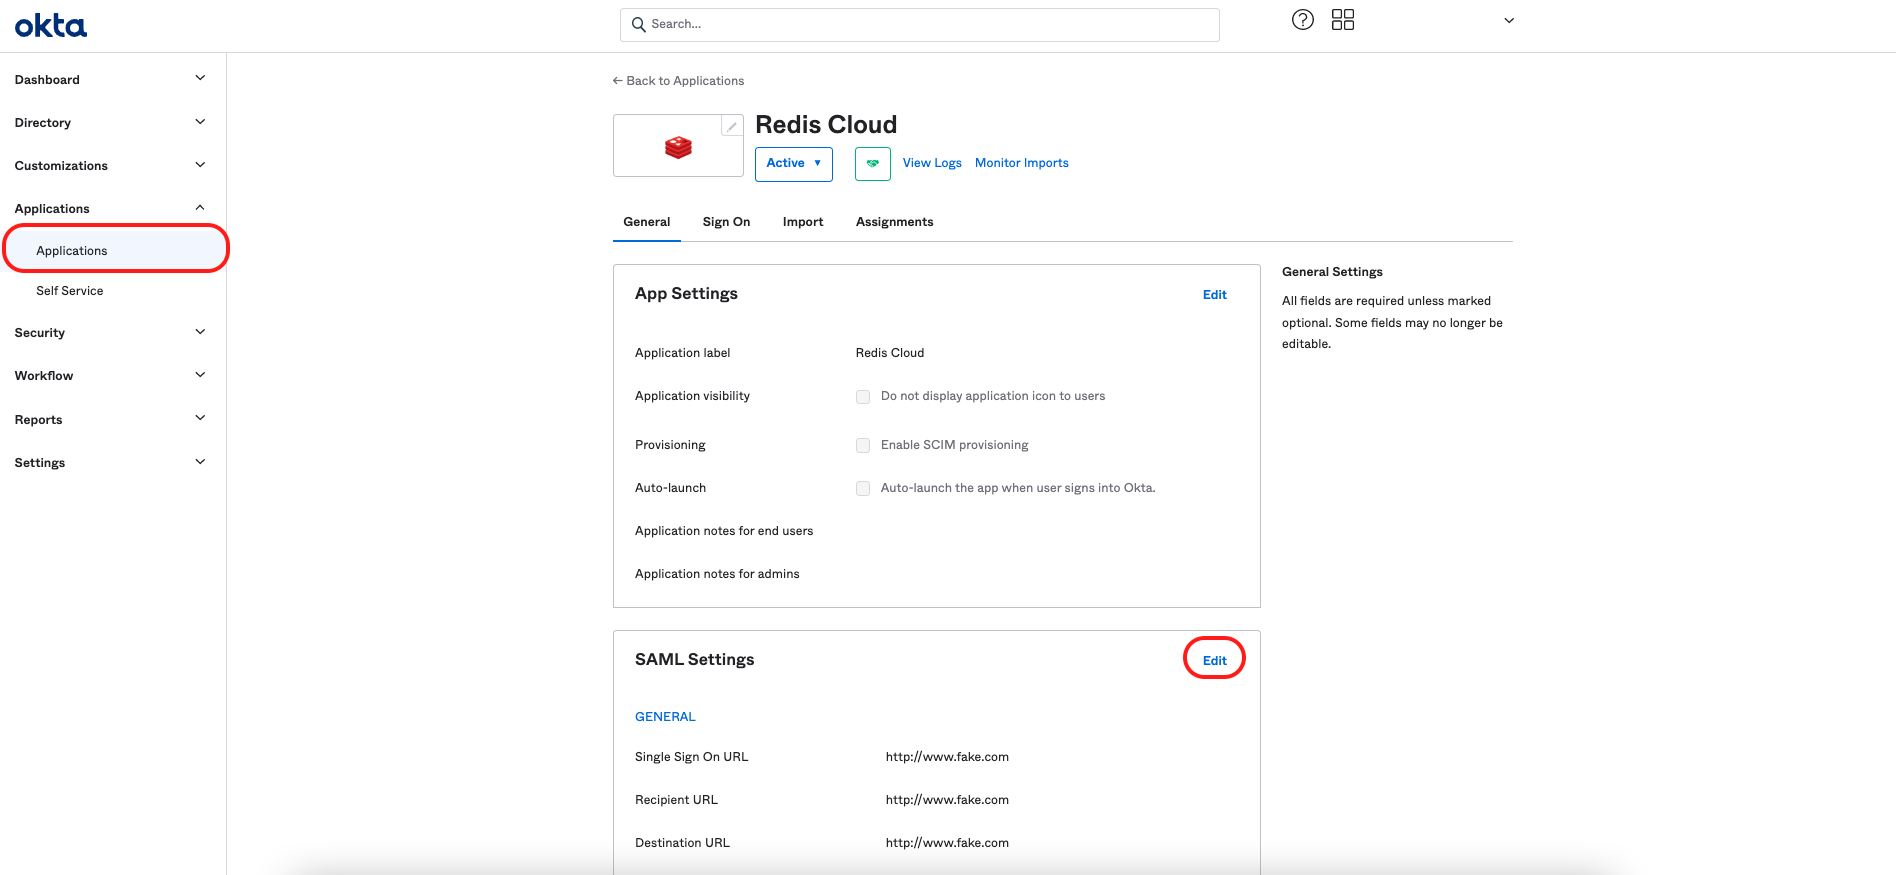
-
Then, navigate to Configure SAML (step 2) and update the following information in SAML Settings General:
- Single sign-on URL: Use the information that you copied for Location.
- Audience URI (SP Entity ID): Use the information that you copied for EntityID.
- Default RelayState: Only needed if you want to have an IdP initiated flow. Take the ID from the location URL in step 3 (the content after the last forward slash "/") and append to the url (for example,
https://cloud.redis.io/#/login/?idpId=YOUR_LOCATION_ID).
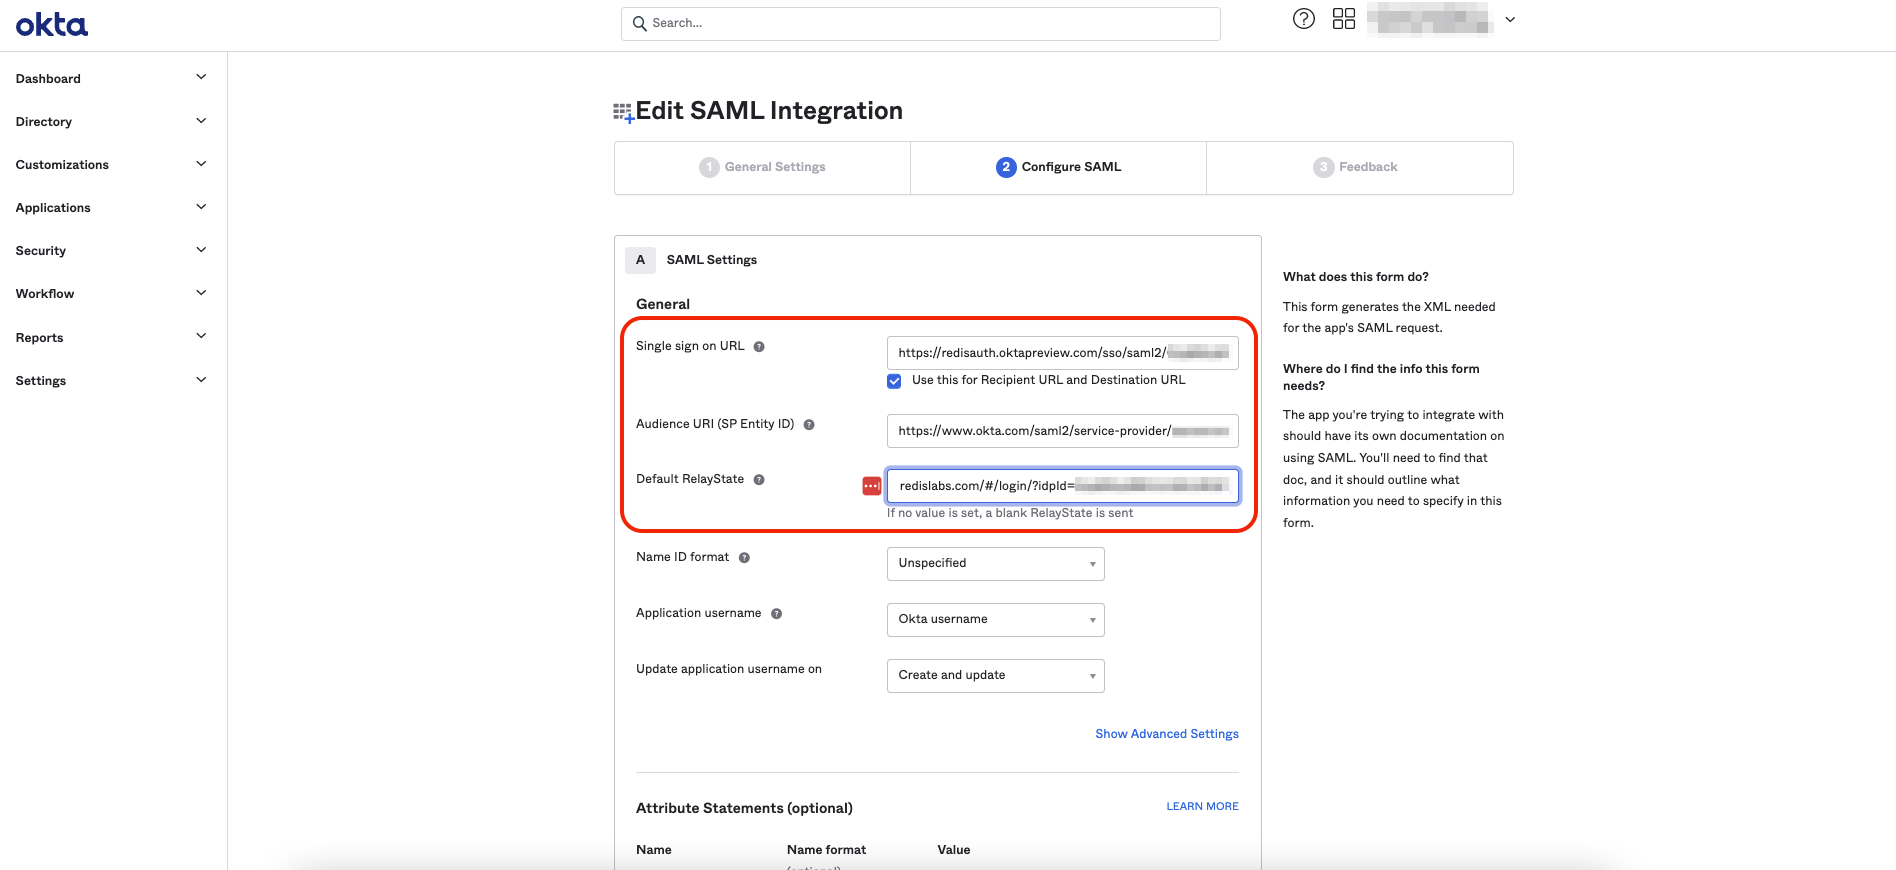
Select Next, then select Finish.
Return to Redis Cloud console
-
Return to Redis Cloud console and select Activate.

A popup appears, stating that to test the SAML connection, you need to log in with Okta credentials of the user defined in the Redis Cloud group. This user is part of the group to which you assigned the Redis Cloud application. Select Continue to go to the Okta login screen.
-
The Okta login screen appears. Enter the credentials and select Sign In.
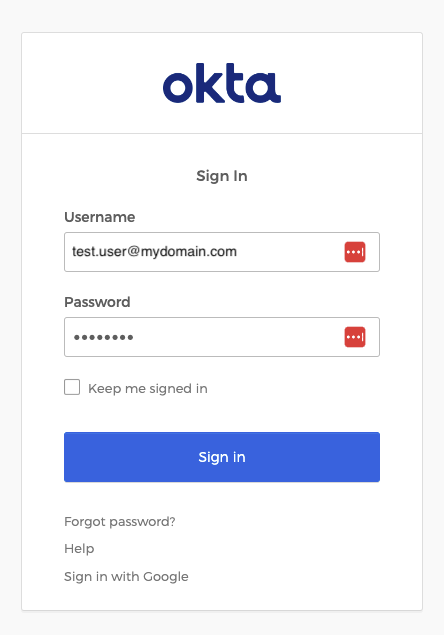
If everything is configured correctly, you will see the the Redis Cloud console screen. Your local account is now considered a SAML account.
To log in to the Redis Cloud console from now on, click on Sign in with SSO.
